A primer to deploying Cisco AnyConnect for macOS with Microsoft Intune
This article is not intended to be exhaustive or "best practices". I only wanted to share my findings in the hope that it'll help others to save time. Please leave a comment for suggestions or ideas!
In order to deploy Cisco AnyConnect on macOS, you'll need the following resources on the client:
SystemExtension profile
WebContentFilter profile
Cisco AnyConnect XML profile
Cisco AnyConnect package
SystemExtension profile
If you skip this section and the next, your users will get prompted to allow the System Extension or the content filter to load. Start with these ones because you want them to be on the Mac before installing the package, so it will be automatically allowed.
Go to Devices > macOS > Configuration Profiles and create a new Templates > Extensions profile
Under System extensions > Allowed system extensions, set the Bundle identifier as "com.cisco.anyconnect.macos.acsockext" and the Team identifier to "DE8Y96K9QP"
Under Allowed system extension types, add a line to allow team identifier "DE8Y96K9QP" to provide "Network extensions".

References
WebContentFilter profile
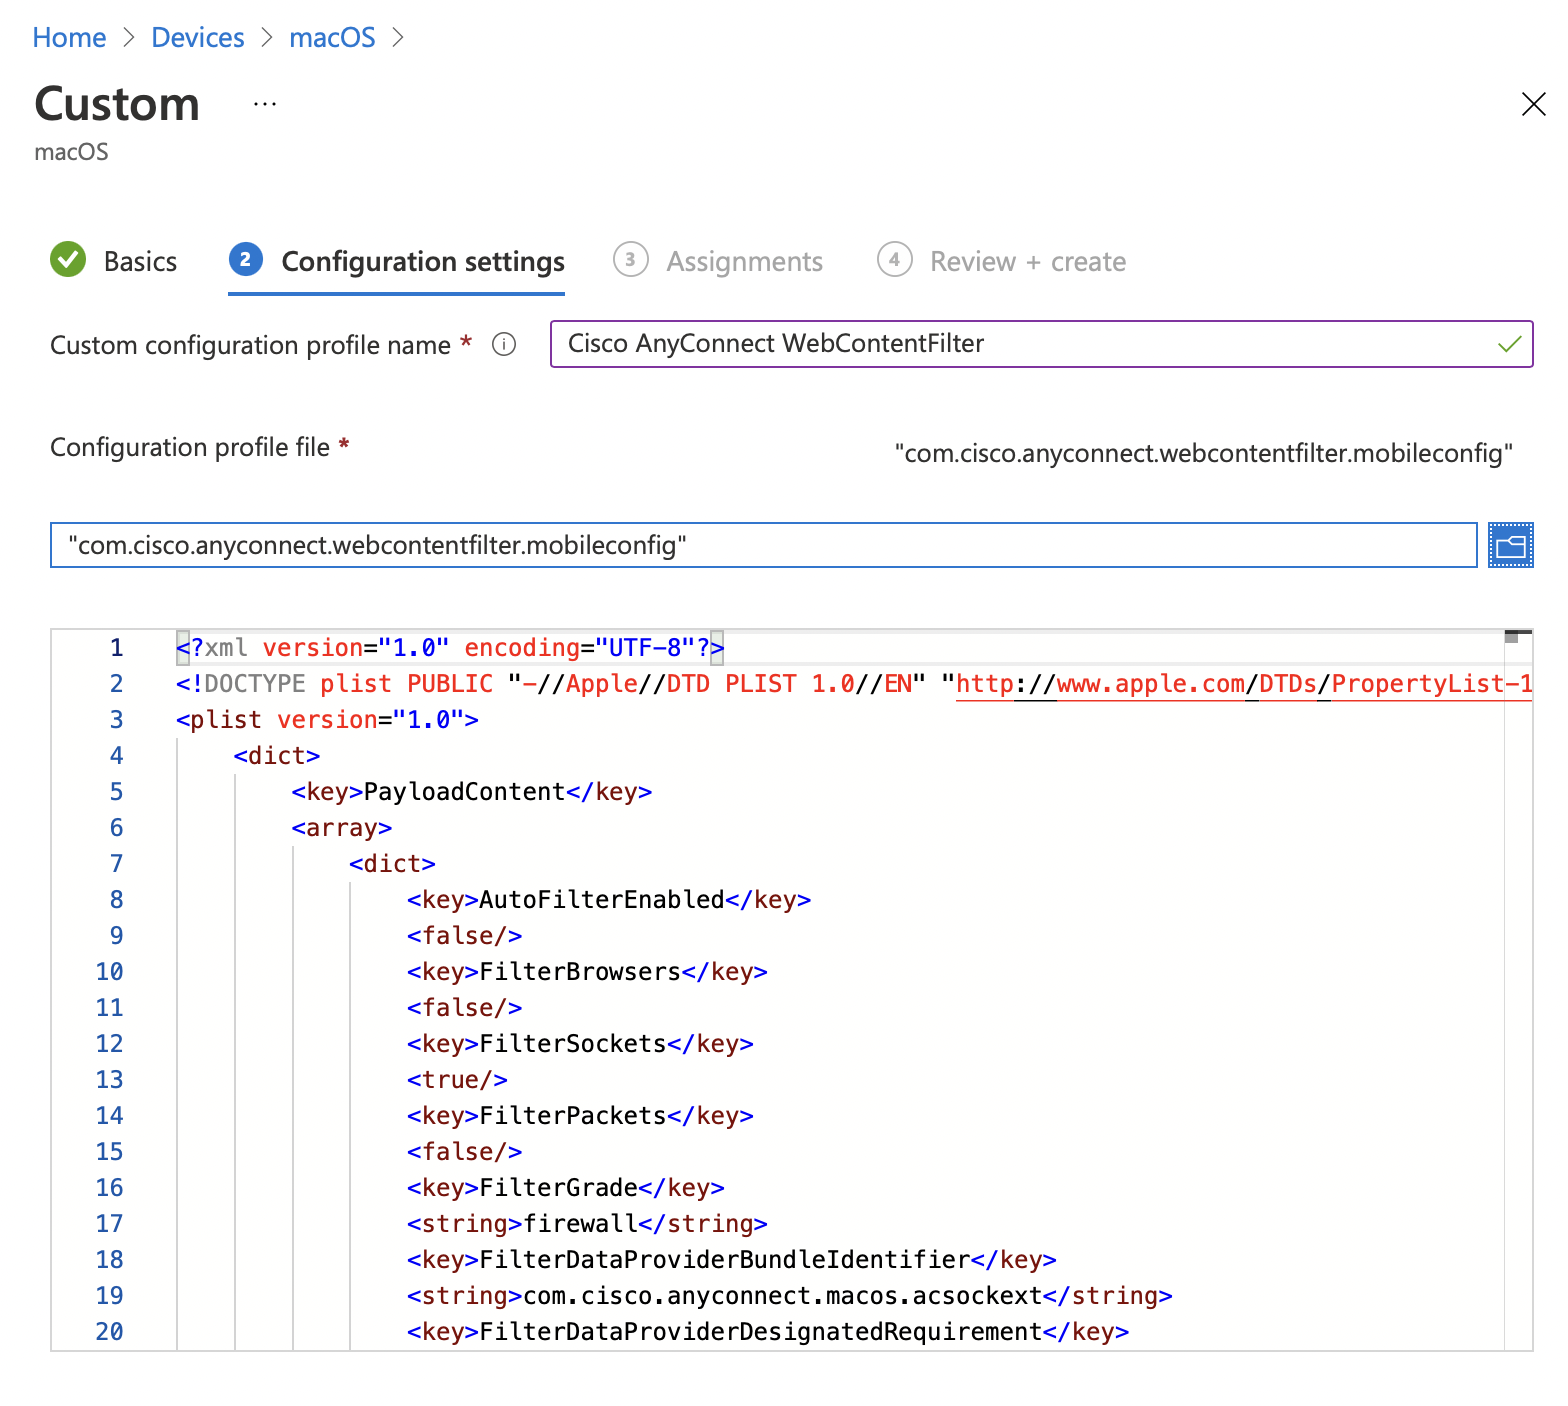
Unfortunately, Microsoft Intune doesn't provide a way to do this in the web UI. You'll have to create an XML configuration and upload it as a new configuration profile, Templates > Custom.
Below is the configuration profile I created, but you can also use Cisco’s example.
<plist version="1.0"> <dict> <key>PayloadContent</key> <array> <dict> <key>Enabled</key> <true/> <key>FilterType</key> <string>Plugin</string> <key>AutoFilterEnabled</key> <false/> <key>FilterBrowsers</key> <false/> <key>FilterSockets</key> <true/> <key>FilterPackets</key> <false/> <key>FilterGrade</key> <string>firewall</string> <key>FilterDataProviderBundleIdentifier</key> <string>com.cisco.anyconnect.macos.acsockext</string> <key>FilterDataProviderDesignatedRequirement</key> <string>anchor apple generic and identifier "com.cisco.anyconnect.macos.acsockext" and (certificate leaf[field.1.2.840.113635.100.6.1.9] /* exists */ or certificate 1[field.1.2.840.113635.100.6.2.6] /* exists */ and certificate leaf[field.1.2.840.113635.100.6.1.13] /* exists */ and certificate leaf[subject.OU] = DE8Y96K9QP)</string> <key>PluginBundleID</key> <string>com.cisco.anyconnect.macos.acsock</string> <key>VendorConfig</key> <dict/> <key>UserDefinedName</key> <string>Cisco AnyConnect Content Filter</string> <key>PayloadDisplayName</key> <string>Cisco AnyConnect Content Filter</string> <key>PayloadIdentifier</key> <string>com.cisco.anyconnect.webcontentfilter.42B8BA0E-57F4-4E57-872B-1F5FCB8527EA.2512DB6A-B5EA-41DB-B6C6-3A07726C214E</string> <key>PayloadType</key> <string>com.apple.webcontent-filter</string> <key>PayloadUUID</key> <string>2512DB6A-B5EA-41DB-B6C6-3A07726C214E</string> <key>PayloadVersion</key> <integer>1</integer> </dict> </array> <key>PayloadDisplayName</key> <string>Cisco AnyConnect Content Filter</string> <key>PayloadIdentifier</key> <string>com.cisco.anyconnect.webcontentfilter.42B8BA0E-57F4-4E57-872B-1F5FCB8527EA</string> <key>PayloadScope</key> <string>System</string> <key>PayloadType</key> <string>Configuration</string> <key>PayloadUUID</key> <string>42B8BA0E-57F4-4E57-872B-1F5FCB8527EA</string> <key>PayloadVersion</key> <integer>1</integer> </dict> </plist>
References
Cisco AnyConnect XML profile
For Cisco AnyConnect to pre-populate some information, you'll need to place a configuration profile at /opt/cisco/anyconnect/profile/profile.xml. You could do this with a package, but if I remember well, Intune is not great at dealing with packages that don't place an application in /Applications. So instead, we'll use a script.
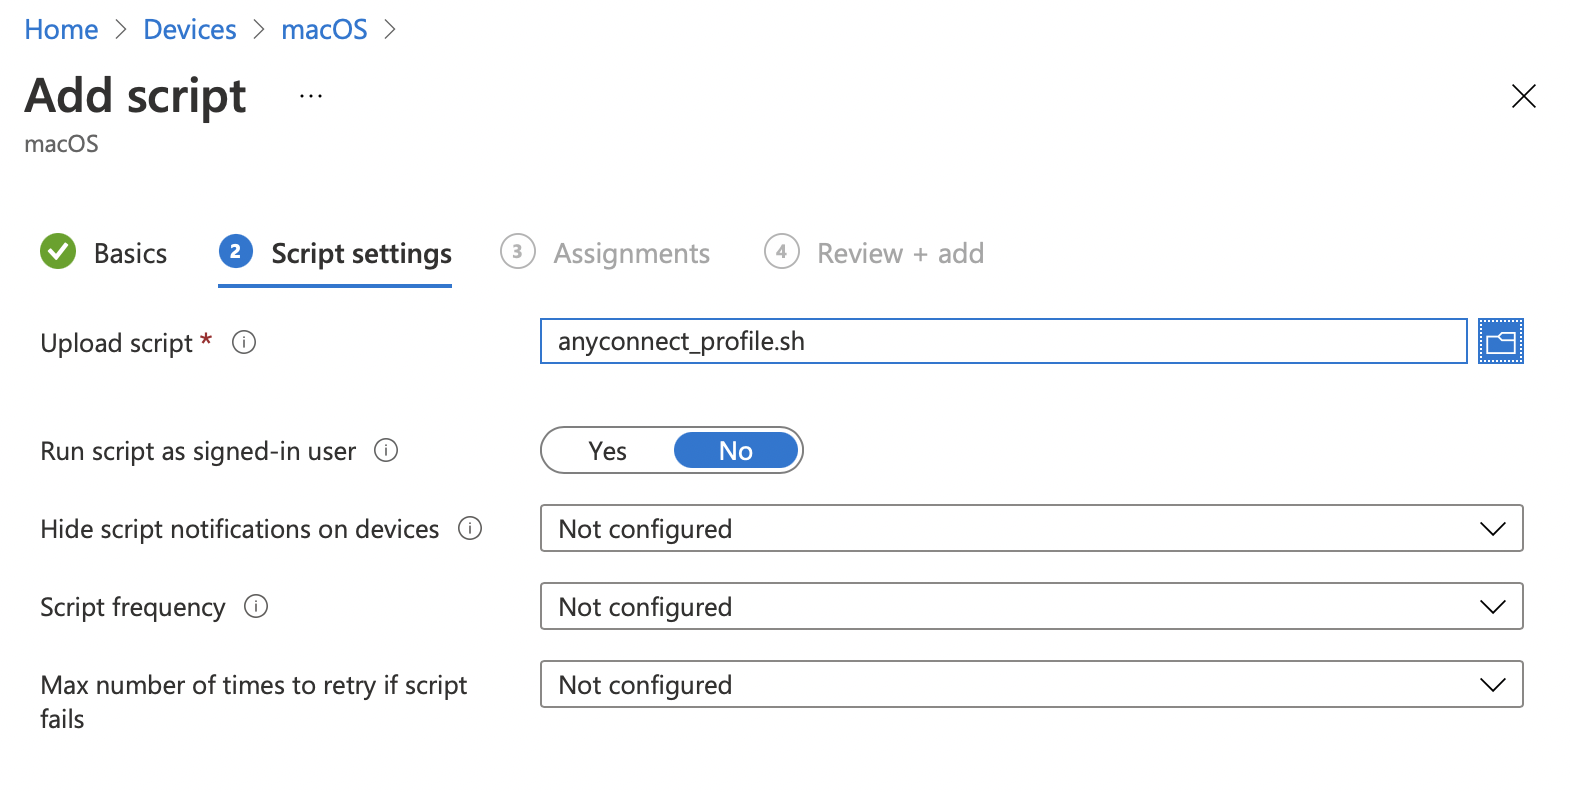
Copy/paste the following in a .sh file, modify it to your needs, then upload it as a script on Intune by going to Devices > macOS > Shell scripts. Don’t run the script as the signed-in user, we want to write the file in a directory that is not writable by standard users.
Below is the one I created for test purposes. If I understand well, your ASA administrator should hand you the XML profile.
#!/bin/sh

mkdir -p /opt/cisco/anyconnect/profile

cat <<EOF>/opt/cisco/anyconnect/profile/profile.xml
<?xml version="1.0" encoding="UTF-8"?>
<AnyConnectProfile xmlns="http://schemas.xmlsoap.org/encoding/">
<ServerList>
<HostEntry>
<HostName>1.2.3.4</HostName>
<HostAddress>https://1.2.3.4</HostAddress>
</HostEntry>
</ServerList>
</AnyConnectProfile>
EOF
Devices > macOS > Shell scripts
Script logs can be find in `/Library/Logs/Microsoft/Intune`
You can force the agent to re-evaluate all scripts by running `sudo killall IntuneMdmAgent`.
Note on using User Identities
I haven’t tested it, but you can have Cisco use a User Identity (private key + public certificate). For this, you’ll need to first install the identity on the Mac’s keychain, most probably using a SCEP profile, then Cisco AnyConnect should be able to do the rest. The user will get prompted to allow Cisco AnyConnect to access the identity in the keychain. Your user will have to click “Always Allow” (see screenshot below). Note that if you deploy the identity in the system keychain (by using a “Computer” configuration profile), the user will have to be a local administrator to allow it. Thank you, D.Y.
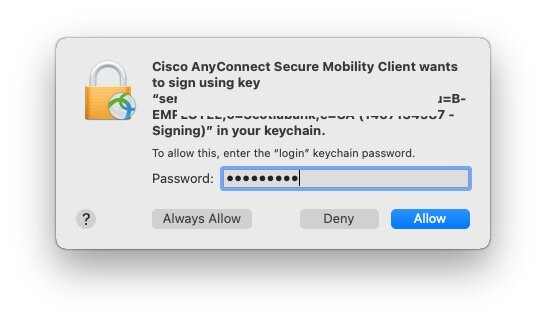
Prompt fir the user to allow Cisco AnyConnect to access an identity in the keychain
Reference
Cisco AnyConnect package
You have two possibilities to install the Cisco AnyConnect package: wrap it then deploy it as a macOS line-of-business (LOB) app, or host it somewhere and use the scripting agent to curl and install it on macOS. The latter is more flexible, but the former is more integrated, and I believe easier to maintain. But it's up to you. Remember that macOS LOB apps must be signed and notarized, and contain an application installing in /Applications. Otherwise they won't install or install in a loop.
Let's do the macOS LOB way.
Download the Intune App Wrapping Tool and make it executable (`chmod +x ./IntuneAppUtil`)
Download the Cisco AnyConnect DMG (I get it directly from my server) and mount it to get the package
Wrap the package using ./IntuneAppUtil -c /Volumes/AnyConnect\ VPN\ 4.10.00093/anyconnect-macos-4.10.00093-core-vpn-webdeploy-k9.pkg -o ~/Downloads
Go to Intune, Apps > macOS
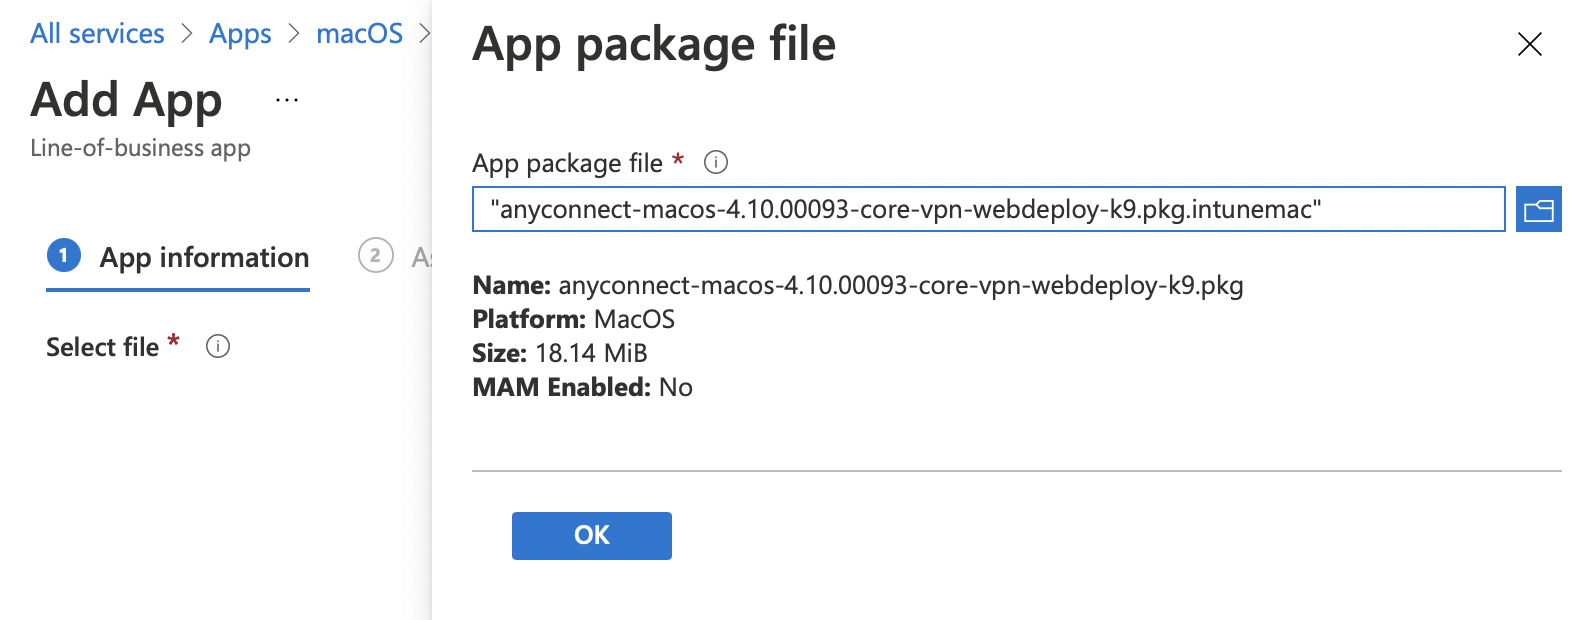
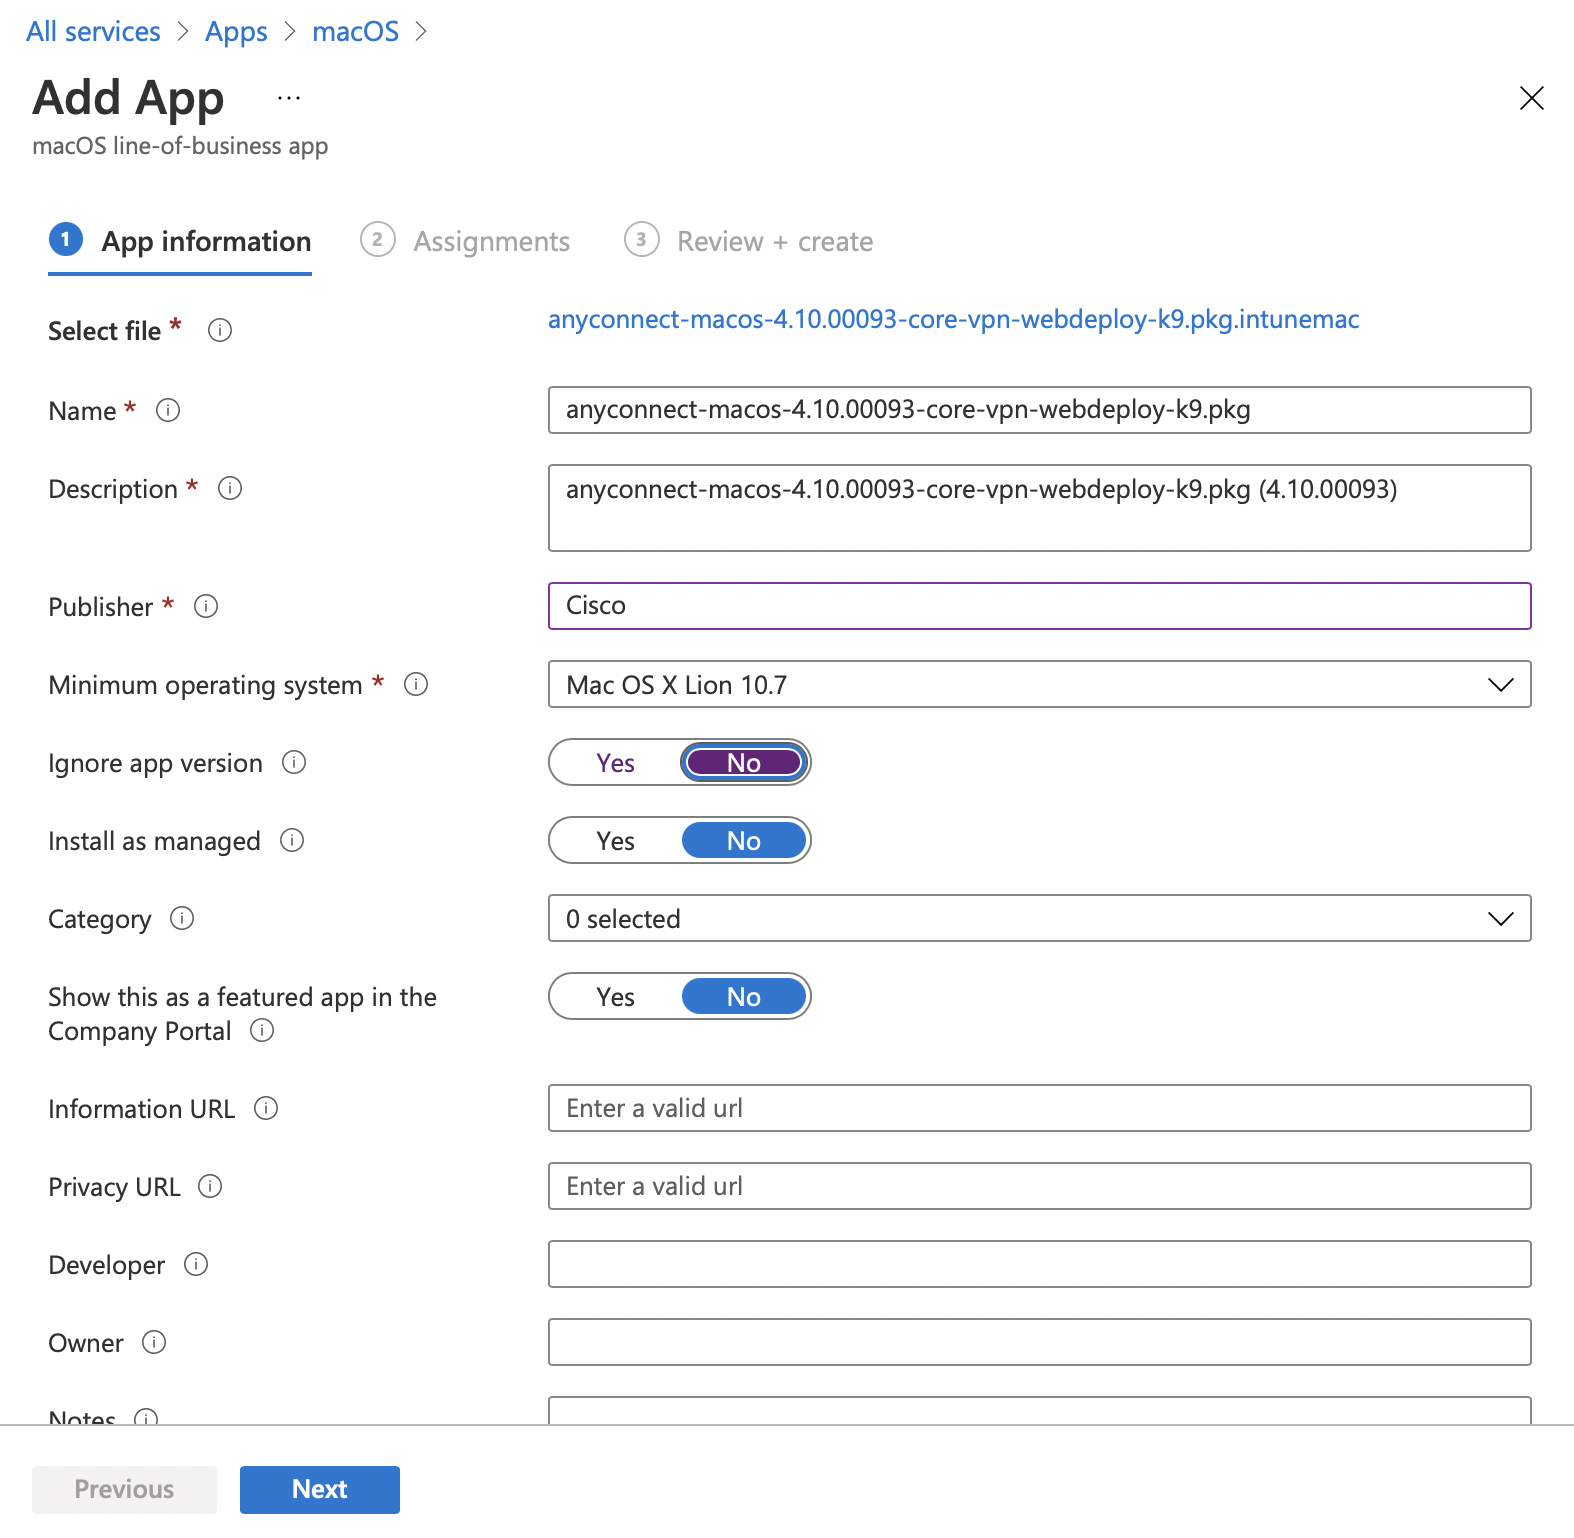
"Add" and choose Other > Line-of-business app
Select the ~/Downloads/anyconnect-macos-4.10.00093-core-vpn-webdeploy-k9.pkg.intunemac you just created and assign it
References
Verifying the installation
After a while (don't hesitate to "Sync" device in Intune), everything will eventually be on the Mac.
You can verify the download of the app by searching for "cisco" in the Console app. Hint: the process responsible to download the package will be appstored.