Apple Configurator: No Space Left on Device

If you get an error “No space left on device” when restoring an iOS device, check your Mac hard drive.

Behind the scenes, Configurator (or Finder) will download an .ipsw to ~/Library/Group Containers/K36BKF7T3D.group.com.apple.configurator/Library/Caches/Firmware then unzip it to a temporary folder (in my case: /var/folders/vr/vv6dbtmd3r7bbk_2mt7qnr1h0000gn/T/com.apple.configurator.xpc.DeviceService). If you don’t have enough space to unzip it, you’ll get this error!

If you restore different model of devices at the same time, keep in mind that every model of device needs its own .ipsw.

In other words, make sure you have about 20GB of free space per device moidel before attempting a restore.

A primer to deploying Cisco AnyConnect for macOS with Microsoft Intune

This article is not intended to be exhaustive or "best practices". I only wanted to share my findings in the hope that it'll help others to save time. Please leave a comment for suggestions or ideas!

In order to deploy Cisco AnyConnect on macOS, you'll need the following resources on the client:

  1. SystemExtension profile

  2. WebContentFilter profile

  3. Cisco AnyConnect XML profile

  4. Cisco AnyConnect package

SystemExtension profile

If you skip this section and the next, your users will get prompted to allow the System Extension or the content filter to load. Start with these ones because you want them to be on the Mac before installing the package, so it will be automatically allowed.

  1. Go to Devices > macOS > Configuration Profiles and create a new Templates > Extensions profile

  2. Under System extensions > Allowed system extensions, set the Bundle identifier as "com.cisco.anyconnect.macos.acsockext" and the Team identifier to "DE8Y96K9QP"

  3. Under Allowed system extension types, add a line to allow team identifier "DE8Y96K9QP" to provide "Network extensions".

References

WebContentFilter profile

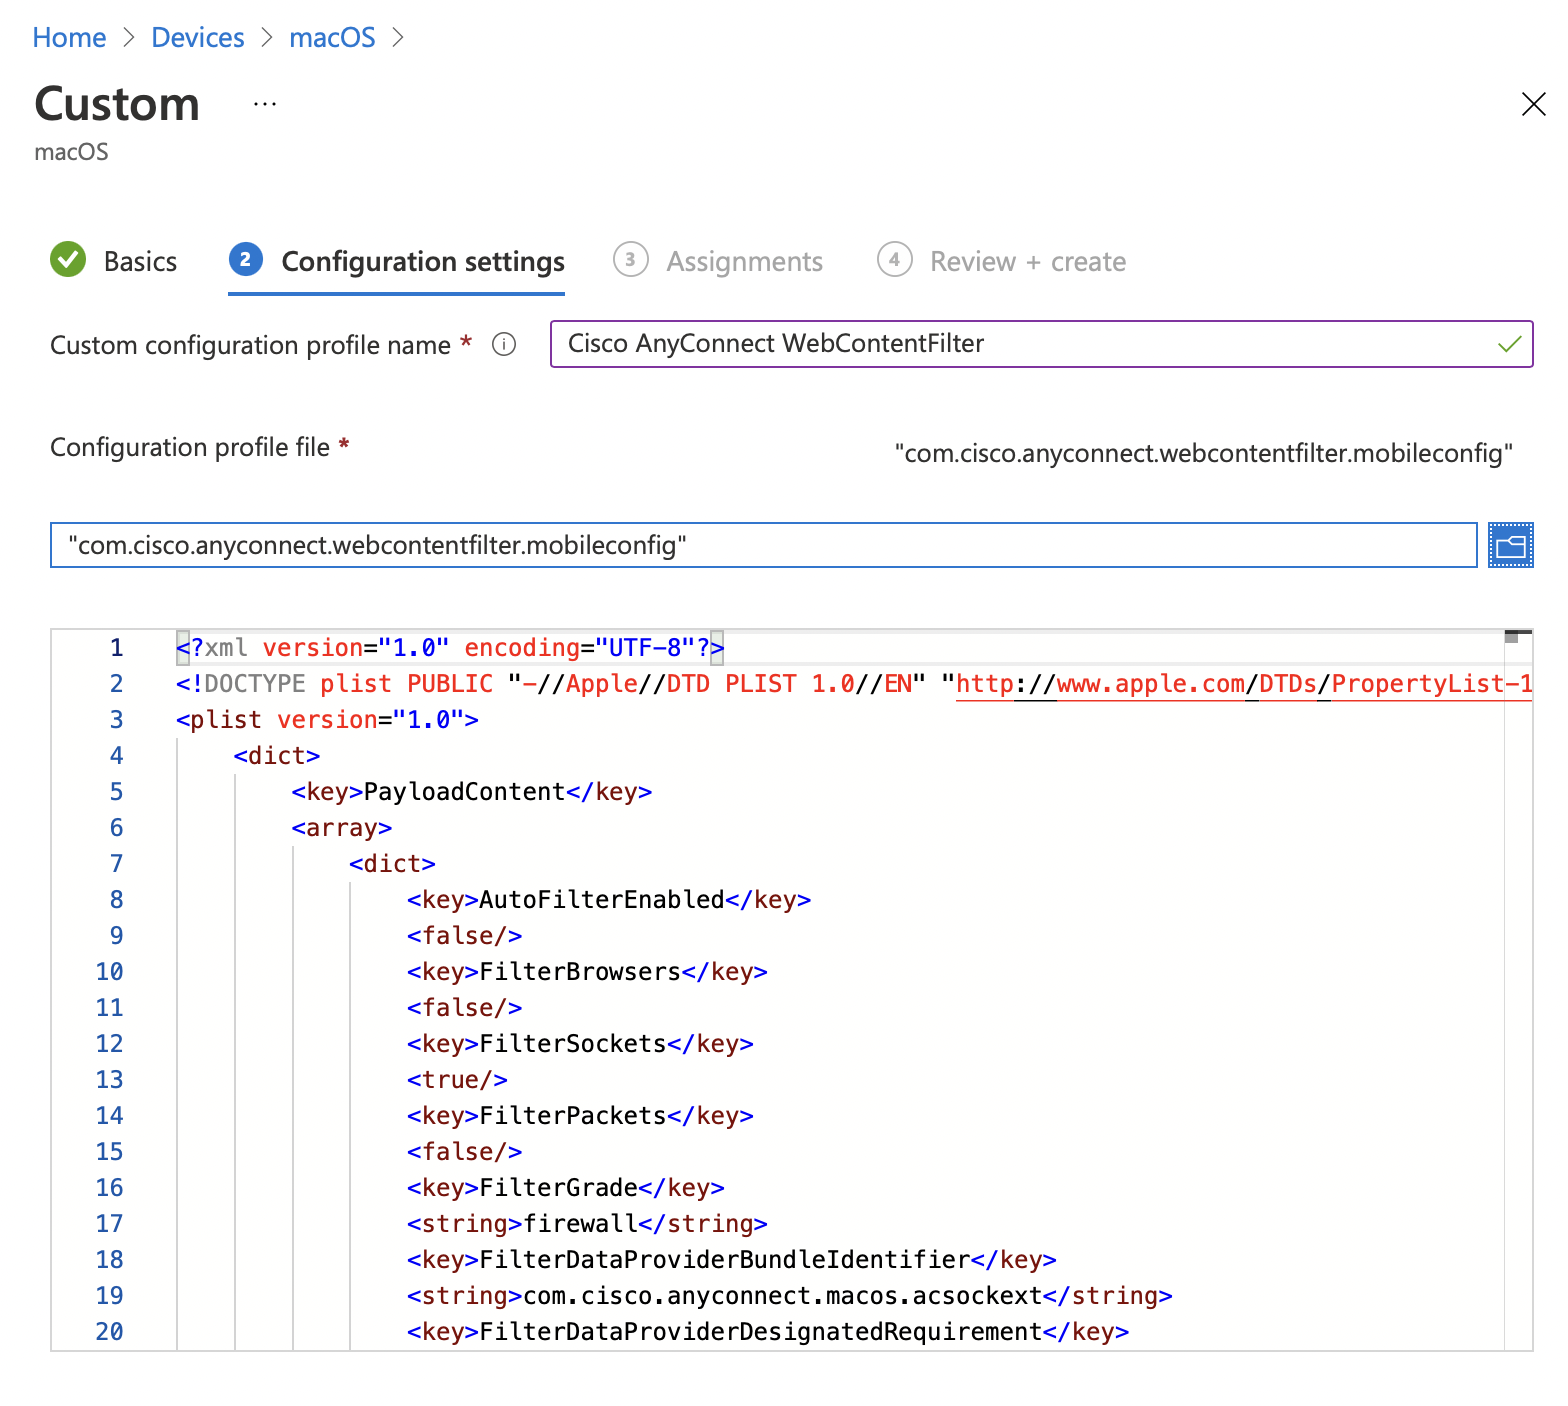
Unfortunately, Microsoft Intune doesn't provide a way to do this in the web UI. You'll have to create an XML configuration and upload it as a new configuration profile, Templates > Custom.

Below is the configuration profile I created, but you can also use Cisco’s example.

<?xml version="1.0" encoding="UTF-8"?> <!DOCTYPE plist PUBLIC "-//Apple//DTD PLIST 1.0//EN" "http://www.apple.com/DTDs/PropertyList-1.0.dtd"> <plist version="1.0"> <dict> <key>PayloadContent</key> <array> <dict> <key>Enabled</key> <true/> <key>FilterType</key> <string>Plugin</string> <key>AutoFilterEnabled</key> <false/> <key>FilterBrowsers</key> <false/> <key>FilterSockets</key> <true/> <key>FilterPackets</key> <false/> <key>FilterGrade</key> <string>firewall</string> <key>FilterDataProviderBundleIdentifier</key> <string>com.cisco.anyconnect.macos.acsockext</string> <key>FilterDataProviderDesignatedRequirement</key> <string>anchor apple generic and identifier "com.cisco.anyconnect.macos.acsockext" and (certificate leaf[field.1.2.840.113635.100.6.1.9] /* exists */ or certificate 1[field.1.2.840.113635.100.6.2.6] /* exists */ and certificate leaf[field.1.2.840.113635.100.6.1.13] /* exists */ and certificate leaf[subject.OU] = DE8Y96K9QP)</string> <key>PluginBundleID</key> <string>com.cisco.anyconnect.macos.acsock</string> <key>VendorConfig</key> <dict/> <key>UserDefinedName</key> <string>Cisco AnyConnect Content Filter</string> <key>PayloadDisplayName</key> <string>Cisco AnyConnect Content Filter</string> <key>PayloadIdentifier</key> <string>com.cisco.anyconnect.webcontentfilter.42B8BA0E-57F4-4E57-872B-1F5FCB8527EA.2512DB6A-B5EA-41DB-B6C6-3A07726C214E</string> <key>PayloadType</key> <string>com.apple.webcontent-filter</string> <key>PayloadUUID</key> <string>2512DB6A-B5EA-41DB-B6C6-3A07726C214E</string> <key>PayloadVersion</key> <integer>1</integer> </dict> </array> <key>PayloadDisplayName</key> <string>Cisco AnyConnect Content Filter</string> <key>PayloadIdentifier</key> <string>com.cisco.anyconnect.webcontentfilter.42B8BA0E-57F4-4E57-872B-1F5FCB8527EA</string> <key>PayloadScope</key> <string>System</string> <key>PayloadType</key> <string>Configuration</string> <key>PayloadUUID</key> <string>42B8BA0E-57F4-4E57-872B-1F5FCB8527EA</string> <key>PayloadVersion</key> <integer>1</integer> </dict> </plist>

References

Cisco AnyConnect XML profile

For Cisco AnyConnect to pre-populate some information, you'll need to place a configuration profile at /opt/cisco/anyconnect/profile/profile.xml. You could do this with a package, but if I remember well, Intune is not great at dealing with packages that don't place an application in /Applications. So instead, we'll use a script.

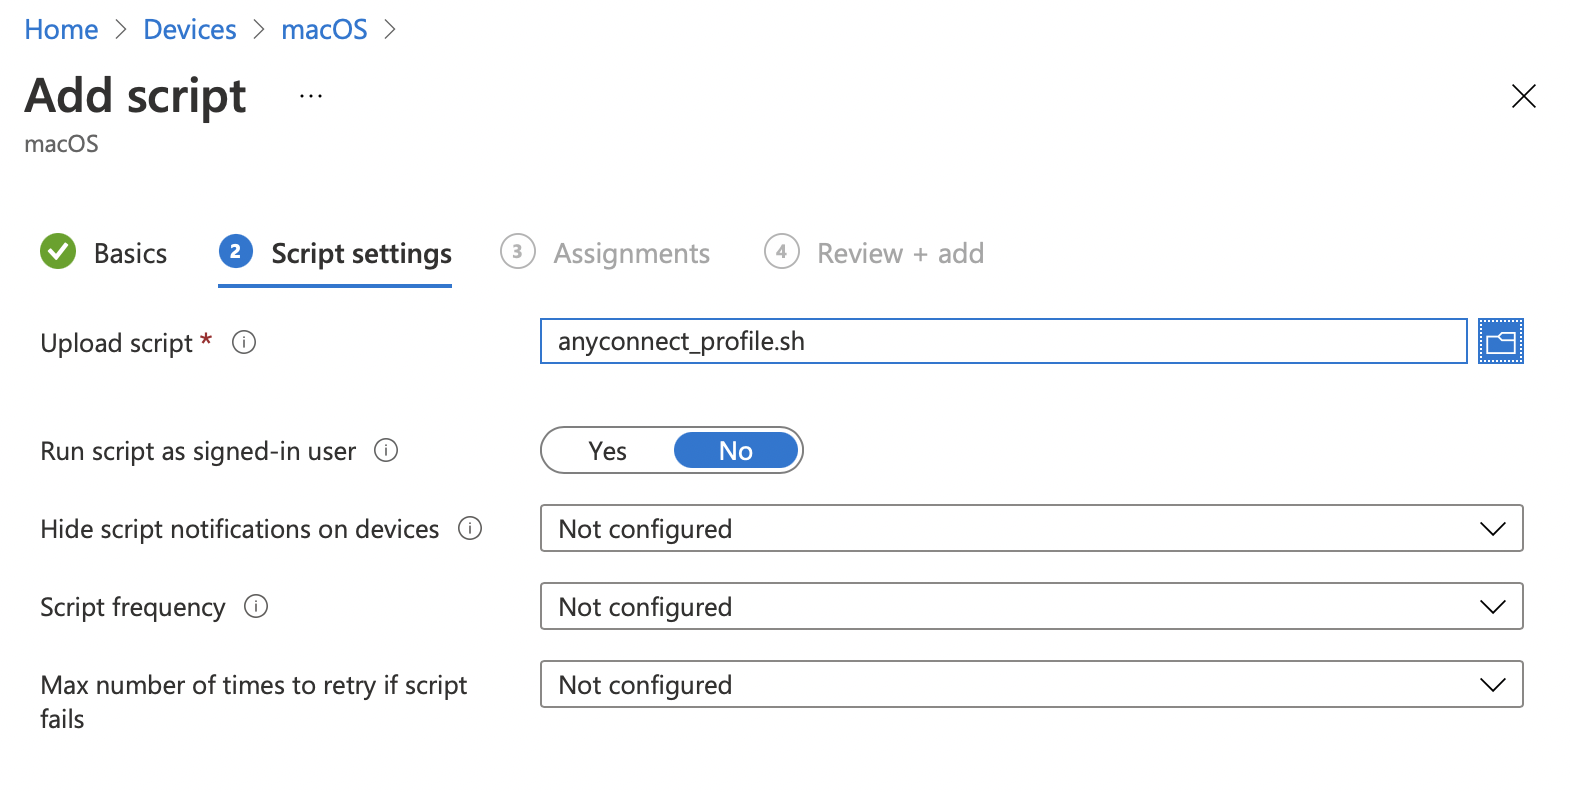
Copy/paste the following in a .sh file, modify it to your needs, then upload it as a script on Intune by going to Devices > macOS > Shell scripts. Don’t run the script as the signed-in user, we want to write the file in a directory that is not writable by standard users.

Below is the one I created for test purposes. If I understand well, your ASA administrator should hand you the XML profile.

#!/bin/sh mkdir -p /opt/cisco/anyconnect/profile cat <<EOF>/opt/cisco/anyconnect/profile/profile.xml <?xml version="1.0" encoding="UTF-8"?> <AnyConnectProfile xmlns="http://schemas.xmlsoap.org/encoding/"> <ServerList> <HostEntry> <HostName>1.2.3.4</HostName> <HostAddress>https://1.2.3.4</HostAddress> </HostEntry> </ServerList> </AnyConnectProfile> EOF
Devices &gt; macOS &gt; Shell scripts

Devices > macOS > Shell scripts

Script logs can be find in `/Library/Logs/Microsoft/Intune`

You can force the agent to re-evaluate all scripts by running `sudo killall IntuneMdmAgent`.

Note on using User Identities

I haven’t tested it, but you can have Cisco use a User Identity (private key + public certificate). For this, you’ll need to first install the identity on the Mac’s keychain, most probably using a SCEP profile, then Cisco AnyConnect should be able to do the rest. The user will get prompted to allow Cisco AnyConnect to access the identity in the keychain. Your user will have to click “Always Allow” (see screenshot below). Note that if you deploy the identity in the system keychain (by using a “Computer” configuration profile), the user will have to be a local administrator to allow it. Thank you, D.Y.

Prompt fir the user to allow Cisco AnyConnect to access an identity in the keychain

Prompt fir the user to allow Cisco AnyConnect to access an identity in the keychain

Reference

Cisco AnyConnect package

You have two possibilities to install the Cisco AnyConnect package: wrap it then deploy it as a macOS line-of-business (LOB) app, or host it somewhere and use the scripting agent to curl and install it on macOS. The latter is more flexible, but the former is more integrated, and I believe easier to maintain. But it's up to you. Remember that macOS LOB apps must be signed and notarized, and contain an application installing in /Applications. Otherwise they won't install or install in a loop.

Let's do the macOS LOB way.

  1. Download the Intune App Wrapping Tool and make it executable (`chmod +x ./IntuneAppUtil`)

  2. Download the Cisco AnyConnect DMG (I get it directly from my server) and mount it to get the package

  3. Wrap the package using ./IntuneAppUtil -c /Volumes/AnyConnect\ VPN\ 4.10.00093/anyconnect-macos-4.10.00093-core-vpn-webdeploy-k9.pkg -o ~/Downloads

  4. Go to Intune, Apps > macOS

  5. "Add" and choose Other > Line-of-business app

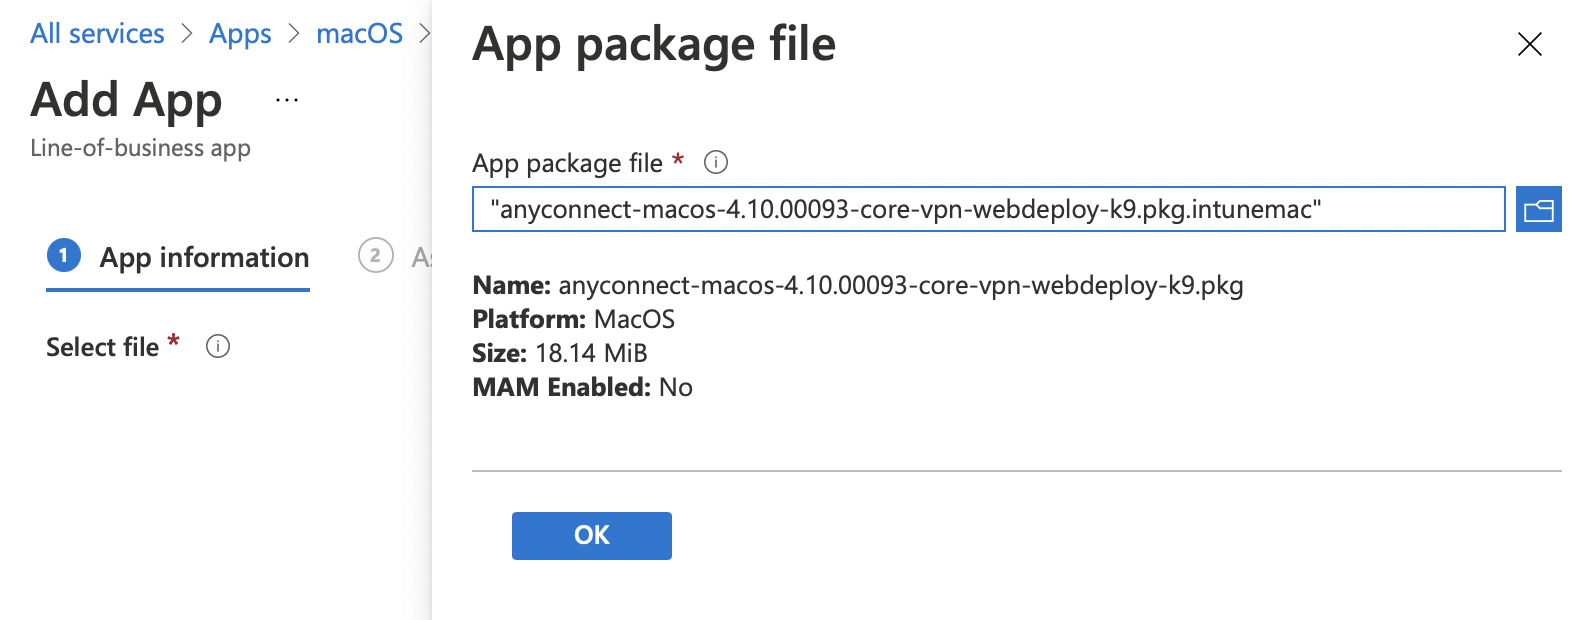
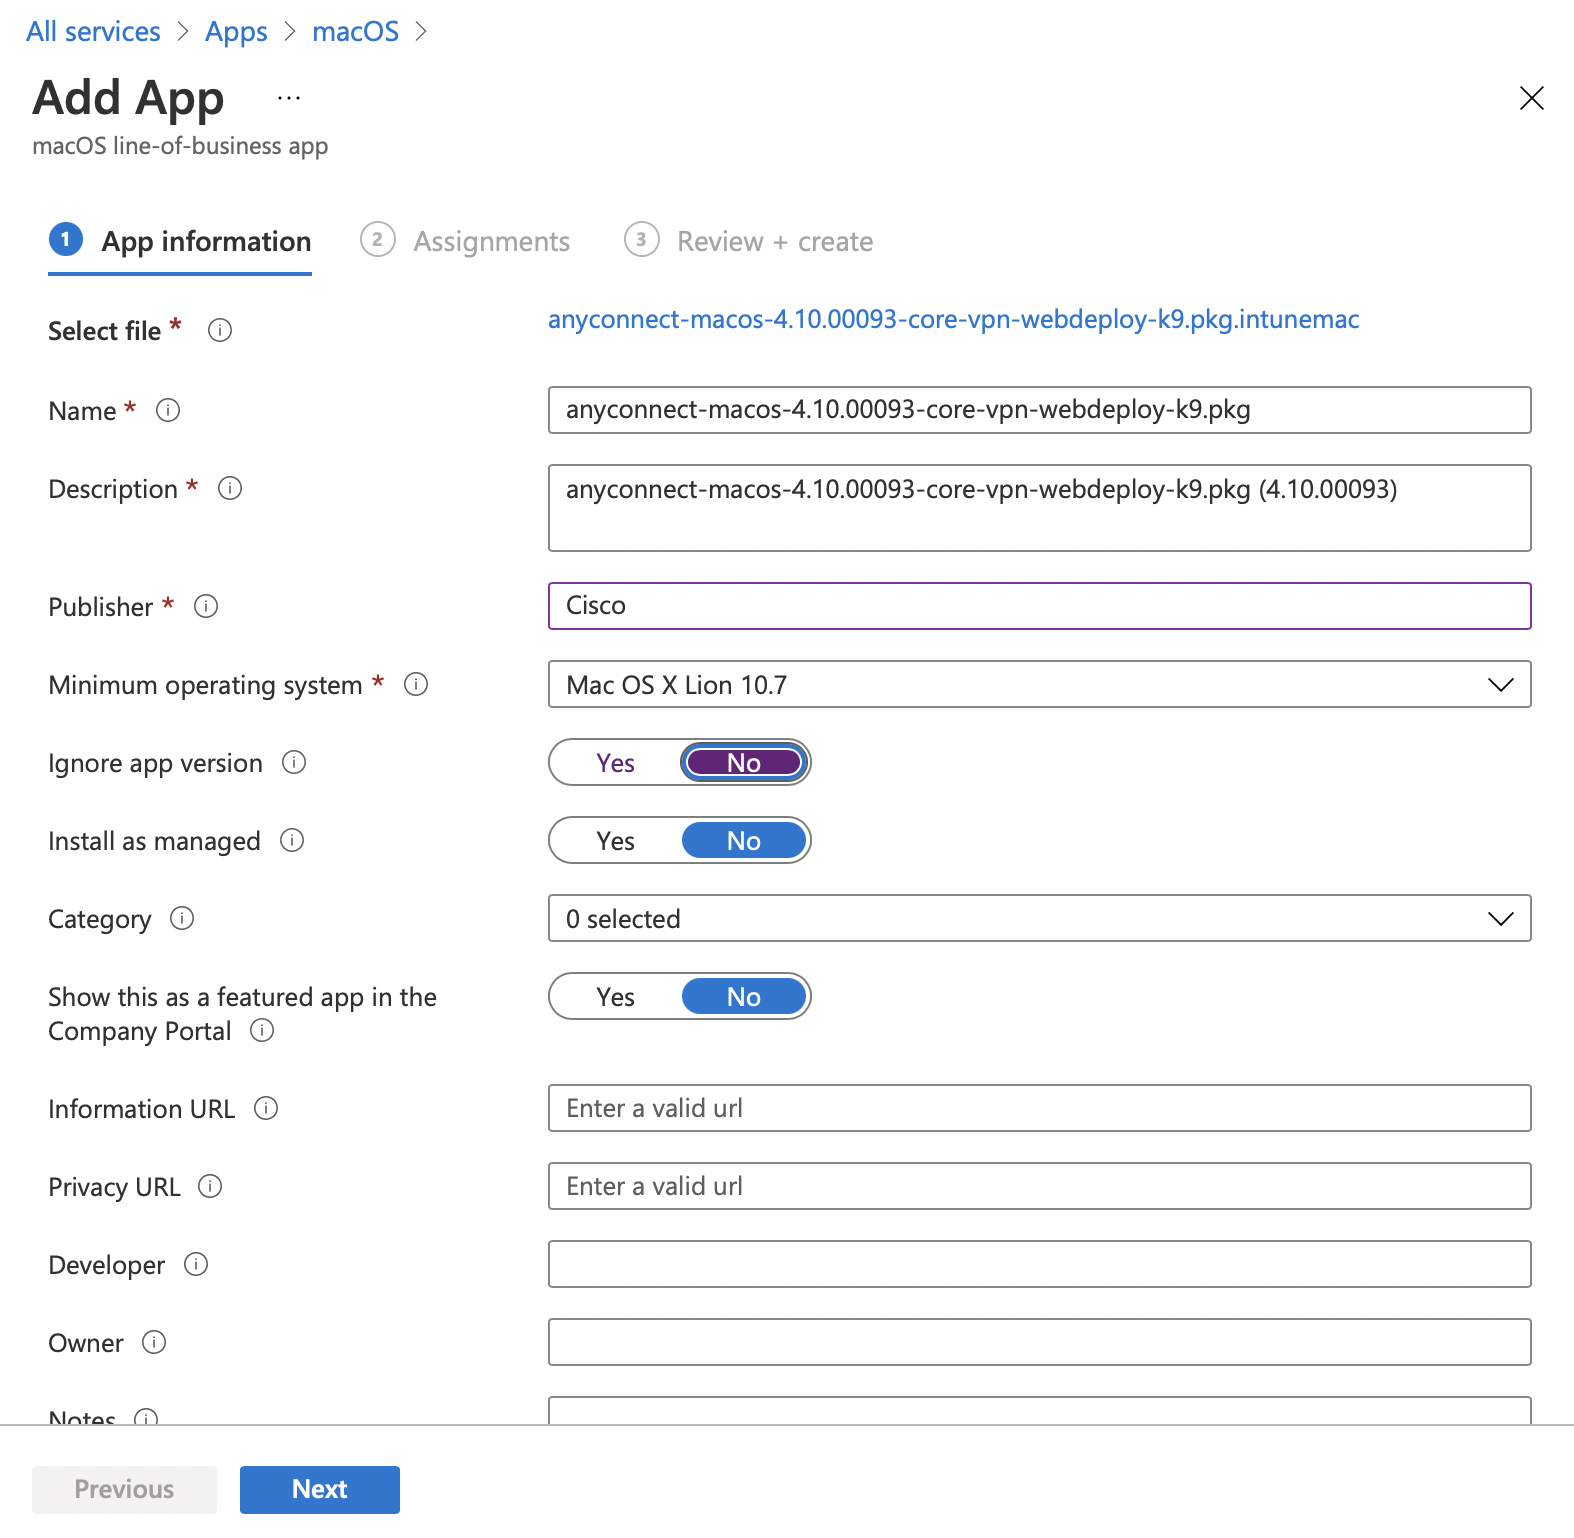
  6. Select the ~/Downloads/anyconnect-macos-4.10.00093-core-vpn-webdeploy-k9.pkg.intunemac you just created and assign it

Screen Shot 2021-06-14 at 8.17.08 AM.png

References

Verifying the installation

After a while (don't hesitate to "Sync" device in Intune), everything will eventually be on the Mac.

You can verify the download of the app by searching for "cisco" in the Console app. Hint: the process responsible to download the package will be appstored.

Putting an M1 MacBook Air or Pro in DFU mode

Update: have a look at the updated Apple documentation first, then come back if needed.

Update 2: Mr. Macintosh has a great video about putting Mac in DFU mode.

I heard around that putting a Mac in DFU mode is a hit and miss. Well, maybe I’m lucky, but I have a 100% success rate!

DFU M1 MacBook Air or Pro - my method

  1. Plug M1 Mac to host Mac using a DFU cable, such as this one. Make sure you use the correct port.

  2. Shut down M1 Mac

  3. Press together:

    1. right SHIFT

    2. left CONTROL

    3. left OPTION

  4. While you hold the 3 keys, press and hold the power button

  5. Release the 3 keys after counting 10 seconds out loud. You’ll see an Apple logo while you count, just ignore it.

  6. Keep power button pressed for 10 additional seconds.

  7. Display stays black, it’s normal.

Now you can use Apple Configurator 2 to restore it! Make sure you use the latest version on the latest macOS.

DFU M1 MacBook Air or Pro - Tim’s method

Another way from Tim Perfitt:

  1. Turn on the Mac (or leave it on)

  2. Once it starts booting, hold the power/keyboard combo (right shift, left control, left option) until it shuts off

  3. Count to 3

  4. Release all but the power button for 7 seconds (or until it shows up in AC2)

DFU Mac mini

Mac mini are extremely easy. All you need to do is to unplug from power, wait 10 seconds, hold power button, plug power, wait a few seconds for the LED to be amber. See documentation.

Dropbox with Apple Silicon Mac (M1)

Well all I’m going to say about my new Apple Silicon (M1) Mac is that it’s even more impressive than going from spinning disks to SSD… And this is just navigating around and using business apps. I’m not even talking about Xcode, Final Cut Pro X and Adobe. I still cannot believe it. Everything is extremely fast. Even Safari feels snappier. For real.

Ok, enough. If you’re looking for a version of Dropbox compatible with Apple Silicon Mac, try here: https://www.dropboxforum.com/t5/Dropbox-desktop-client-builds/Beta-Build-110-3-425/td-p/469550

Start a FaceTime call from an URL

I love FaceTime. The sound is crystal clear, which is important for me who learnt English as a Second Language. While I’m sure you’re well aware of how to start a FaceTime call (if not, Apple has a great video), you may not know that you can also use links.

  • facetime:// will start a FaceTime video call

  • facetime-audio:// will start a FaceTime audio call

You can use this in many places. I use it in my mail signature, to give an easy way for recipients to call me. You can use your phone number of your Apple ID. Note: you can use tel:// for standard phone calls.

Reference: FaceTime Links

Send a syncDevice from bash to an iOS device enrolled in Microsoft Intune

One thing that can be quite problematic with Microsoft Intune, is that it syncs with the device every 8 hours (every 15mn the first hour). It is usually fine, but in some scenarios you’ll want to trigger a sync programmatically.

This post will walk you through how to use Microsoft Intune’s API to trigger a syncDevice from bash, using curl. I’ll show you how to configure an application on Azure Portal to get the credentials, then how to test using Paw, and finally how to make a rudimentary script.

A word of caution: this method works for me, and it is provided “as is”, without warranty of any kind, express or implied. But feel free to add a comment below to improve the post.

Create an app on the Azure portal

First thing we need to do is to create an App on the Azure portal. We’ll choose “Client secrets” to make it easy, but you can use certificates instead (I won’t cover it).

Resources:

So, connect to the Azure portal which is tied to your Microsoft Intune, and select the right tenant.

Create an App Registration

  1. Go to Azure Active Directory

  2. Click on “App registrations”

  3. Click on “New Registration”

    1. Choose a nice name

    2. Select “Accounts in this organizational directory only (XXX only - Single tenant)”

    3. Don’t fill the Redirect URI

Screen Shot 2020-04-18 at 9.14.14 PM.png

Create a client secret

  1. Go to “Certificates & secrets”

  2. Click on “New client secret”

  3. Choose a description and save the token value (you’ll see this only once)

Screen Shot 2020-04-18 at 9.15.58 PM.png

Configure API Permissions

Go to API permissions, then add the following permissions, under “Microsoft Graph”:

  • DeviceManagementManagedDevices.Read.All (Delegated)

  • DeviceManagementManagedDevices.PrivilegedOperations.All (Delegated)

Then click on “Grant admin consent for XXX”.

Screen Shot 2020-04-18 at 10.42.25 PM.png

Write down required information

You will need the following information:

  • Client ID (aka Application ID): find it on the “Overview” tab of the App registration you just created

  • Client Secret: you wrote it down earlier when you created a new client secret. If you haven’t, go back, delete your client secret and create a new one.

  • Tenant domain: If you go back to “Azure Active Directory” then “Custom domain names”, you’ll see it written (e.g. M365x208777.onmicrosoft.com)


Configure the API browser application

I use Paw, but virtually everyone I know uses Postman. If you choose Postman, have a look at the following resources from Microsoft:

Get the Access Token

Microsoft Graph uses OAuth 2.0. Here we want to get a Bearer token which we will use for subsequent calls to the API.

To move forward, create a new request, and enter the following information:

  • POST https://login.microsoftonline.com/[TENANT-DOMAIN]/oauth2/token

  • Body > Form URL-Encoded

    • client_id: the Client ID from “App Registration > Overview” (see earlier)

    • client_secret: the Client Secret you generated earlier

    • Resource: https://graph.microsoft.com

    • grant_type: client_credentials

Then hit CMD+R and the token will be on the right, under “access_token”. Right-click on it and click on “Copy Value”. Don’t do it by double-clicking on the field then CMD+C, otherwise you’ll get an error like “CompactToken parsing failed with error code: 80049217” later on.

Screen Shot 2020-04-18 at 9.33.18 PM.png

Get the Device ID, from the list of devices

Create a new Request, with the following information:

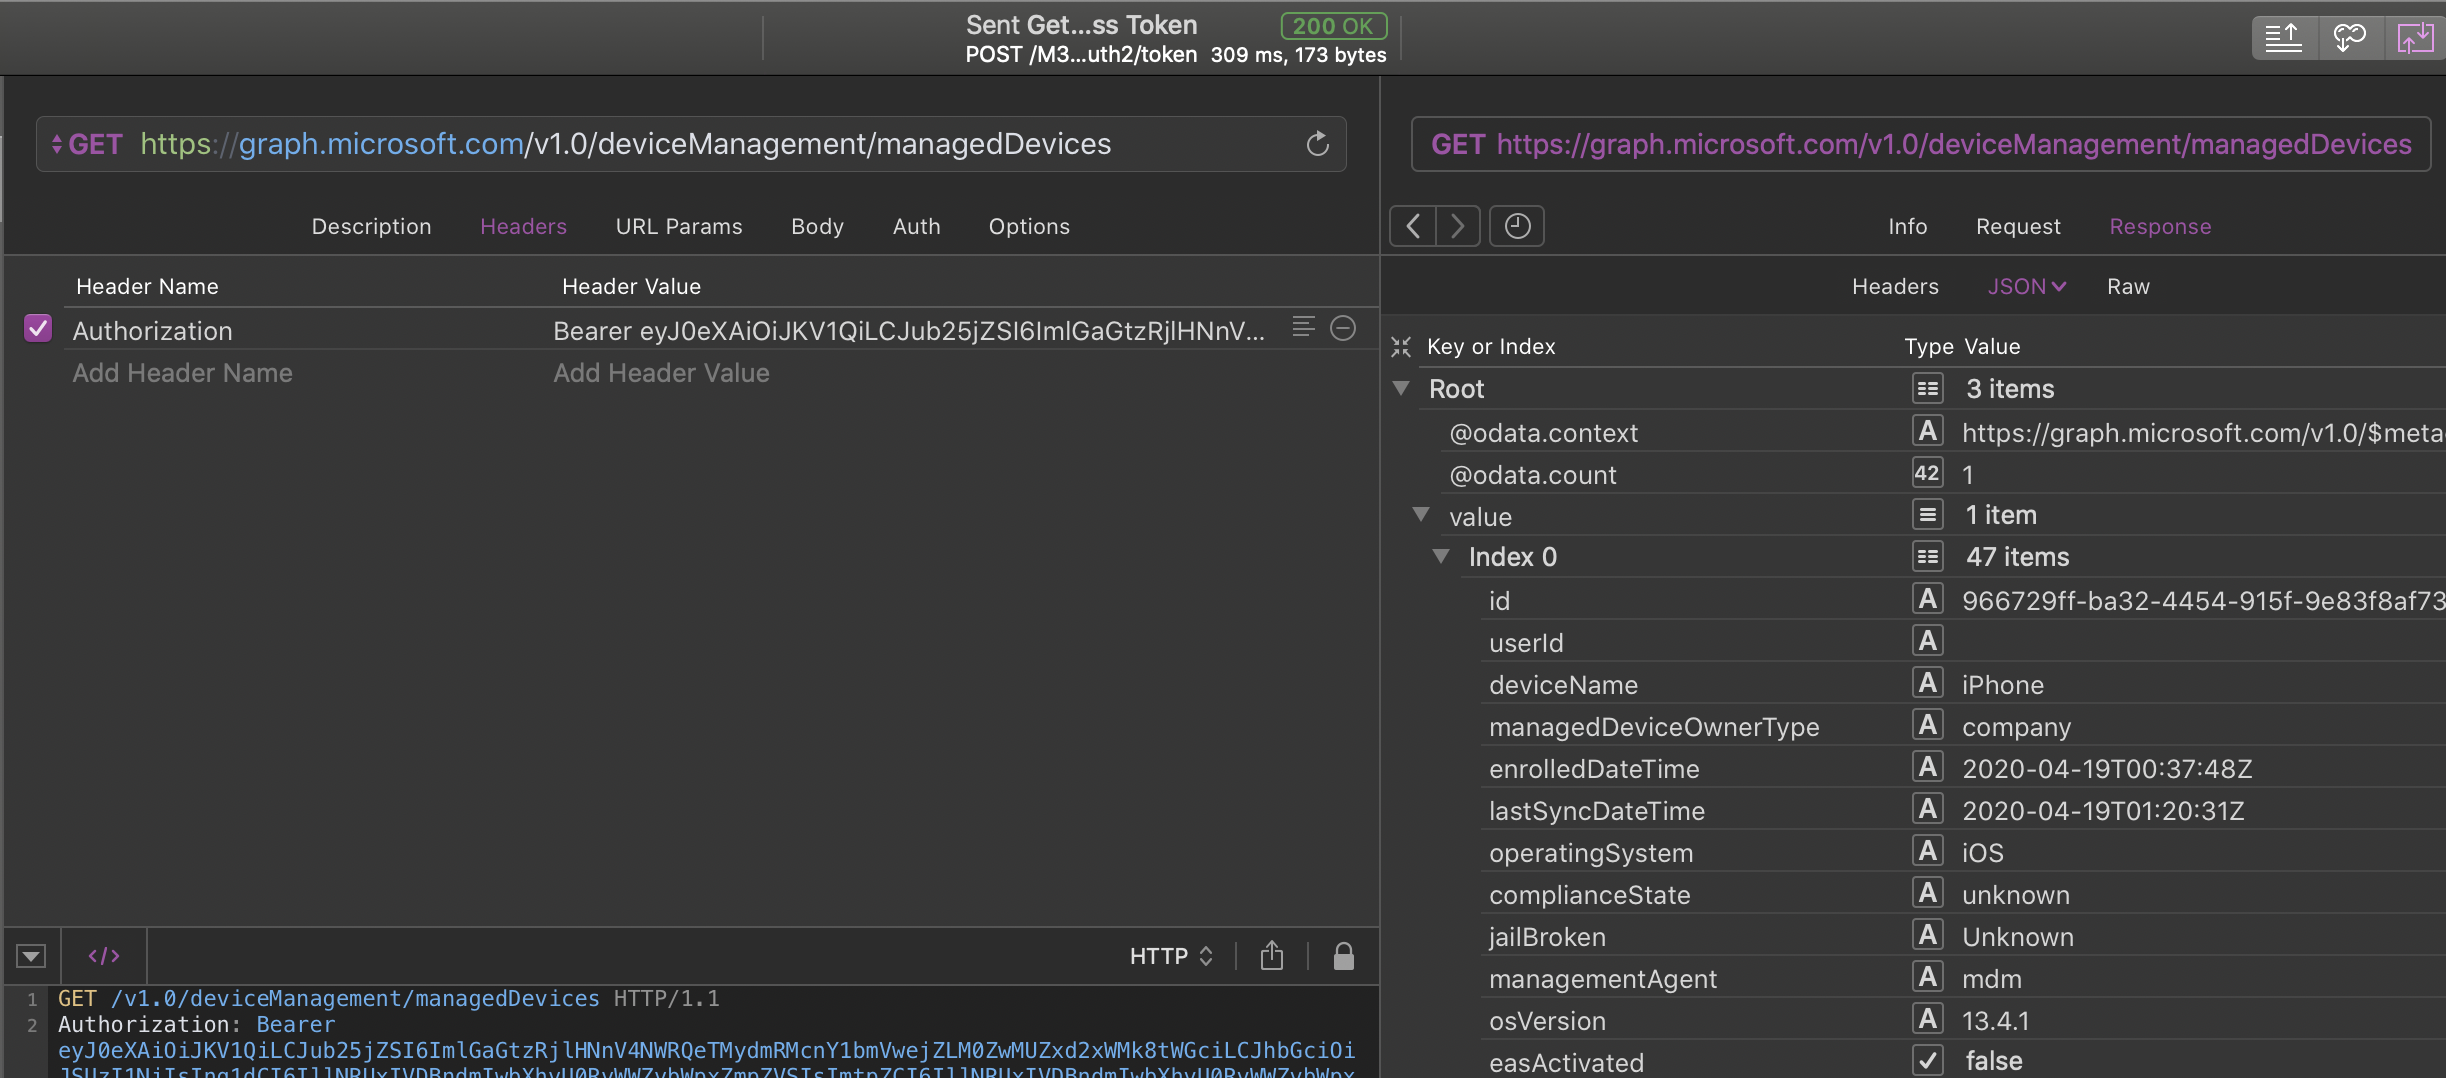
  • GET https://graph.microsoft.com/v1.0/deviceManagement/managedDevices

  • Headers

    • Authorization: “Bearer [access_token]”

Hit “CMD+R” and you should see a list of devices on the right. What interests us is “value.id”. You may want to filter the view by “value.serialNumber” to get the device you want.

Screen Shot 2020-04-18 at 9.38.13 PM.png

Post a “syncDevice” to the device

Resource: https://docs.microsoft.com/en-us/graph/api/intune-devices-manageddevice-syncdevice?view=graph-rest-1.0

Now that you have the device ID, you can create another Request with it:

  • POST https://graph.microsoft.com/v1.0/deviceManagement/managedDevices/[DEVICEID]/syncDevice (make sure you replace [DEVICEID] with the id you found earlier (like 9666-…)

  • Headers

    • Authorization: “Bearer [access_token]”

Hit “CMD+R” and if all goes well, you should get a “204 No Content”.

Screen Shot 2020-04-18 at 9.42.46 PM.png

Verify the device had a sync

Resource: https://docs.microsoft.com/en-us/graph/api/intune-devices-manageddevice-get?view=graph-rest-1.0

We can do a very similar call to get managedDevices, but this time specify the device ID to get a single device instead of an array of all devices. Configure the request this way:

  • GET https://graph.microsoft.com/v1.0/deviceManagement/managedDevices/[DEVICEID] (make sure you replace [DEVICEID] with the id you found earlier (like 9666-…)

  • Headers

    • Authorization: “Bearer [access_token]”

Hit “CMD+R”. We’re interested by “lastSyncDateTime” which should be very close to now (provided the device is on and replied to the push notification). Note that this value is in GMT, so translate to your timezone.

Screen Shot 2020-04-18 at 9.51.51 PM.png

Putting it all together with curl

Install jq

jq is a very powerful JSON parser command line tool. We want to use it to better parse the response from the server. Install it in /opt/local/bin:

  1. Go to https://stedolan.github.io/jq/download/ and download jq 1.6 binary for 64-bit. You can also install it with Homebrew or MacPorts if you prefer.

  2. mkdir -p /opt/local/bin

  3. mv ~/Downloads/jq-osx-amd64 /opt/local/bin/jq

  4. chmod +x /opt/local/bin/jq

Get curl commands from Paw

Paw has a very handy feature that can generate code in many different languages and commands, including curl. to do so, click on the drop down menu top right of the console, and select “cURL” (sic). You can then paste it in your editor of choice.

Screen Shot 2020-04-18 at 10.30.20 PM.png

Search for a specific serial number

Microsoft Graph have query parameters, that will allow you to filter a query with certain parameters. Here, we would like to return all the managedDevices with a specific serial number. To do so, we can use the URL Parameter $filter=startswith(serialNumber, ‘SERIALNUMBER’). You should still get an array, but with a single managedDevice.

Putting it all together

We want to assemble the following:

  1. Get the access token (“.access_token”)

  2. Get a managedDevice from a serial number (“.value[0] .id”)

  3. send the syncDevice command

As a starter, I’ve done the following script. I leave you the task to work on the error control and make it reliable. If you can share it, all the better!

#!/bin/bash

serialNumber="FA1QHC21GRY1"

## 1. Get the Access Token (".access_token")
tokenResult=$(curl -sf -X "POST" "https://login.microsoftonline.com/M365x208777.onmicrosoft.com/oauth2/token" \
     -H 'Content-Type: application/x-www-form-urlencoded; charset=utf-8' \
     --data-urlencode "client_id=ae49b634-5140-48c1-9647-4158754110be" \
     --data-urlencode "client_secret=_SbdfLpAVD-BiLMoqJcQEVN]3AQne470" \
     --data-urlencode "Resource=https://graph.microsoft.com/" \
     --data-urlencode "grant_type=client_credentials")

accessToken=$(echo "${tokenResult}" | /opt/local/bin/jq -r '.access_token')

## Get a managedDevice, from a serial number (".value[0] .id") 
managedDeviceResult=$(curl -sf "https://graph.microsoft.com/v1.0/deviceManagement/managedDevices?\$filter=serialNumber%20eq%20%27${serialNumber}%27" \
     -H "Authorization: Bearer ${accessToken}" \
     -H 'Content-Type: application/x-www-form-urlencoded; charset=utf-8')
deviceID=$(echo "${managedDeviceResult}" | /opt/local/bin/jq -r '.value[0] .id')


## send the syncDevice command
syncDeviceResult=$(curl -sf -X "POST" "https://graph.microsoft.com/v1.0/deviceManagement/managedDevices/${deviceID}/syncDevice" \
     -H "Authorization: Bearer ${accessToken}" \
     -H 'Content-Type: application/x-www-form-urlencoded; charset=utf-8' -d "")

if [ -z "${syncDeviceResult}" ]; then
    echo "syncDevice sent to ${serialNumber}"
fi

Adding iPhone/iPad to Apple Business Manager with VMware Workspace ONE and AC2

I used to create a bogus MDM server in Apple Configurator 2 (AC2) and later re-assign the device in Apple Business Manager (ABM). This doesn’t seem to work anymore. I will see the device in ABM, re-assign it, but Erase All Contents & Settings would remove the Automated Enrollment flag from the device.

I later used to get the Apple Configurator 2 URL “MDM Server URL” (available from Settings > Apple > Automated Enrollment in VMware Workspace ONE), and this seemed to be working well.

Today, I downgraded an iPhone 6s from iOS 13 beta to iOS 12.4.1 to test the beta profile, then hit Prepare > Manual Configuration > Add to Device Enrollment Program, and got multiple errors, like “Invalid Profile” or another error saying it couldn’t connect to the MDM server.

I deleted the MDM server from AC2 Preferences > Server, copied the “MDM Server URL” (available from Settings > Apple > Automated Enrollment in VMware Workspace ONE) and got the error: “Unable to verify the server’s enrollment URL. Unable to read provided data.”

After much trial and error, I found another way to prepare a device, by exporting the enrollment profile (available from Settings > Apple > Automated Enrollment > Export in VMware Workspace ONE), open it in AC2 and copy the MDM Enrollment URL from the profile into AC2. This worked like a charm.

As a reference (obfuscated):

  • MDM Server URL: https://ds618.awmdm.com/DeviceServices/Enrollment/DeviceMdmConfiguration.aspx?shid=aw1v2%3Akv0%3AyD9Yev1YunO%2FiKO%2F%3AEEaLwxtAFgwdnICjXqJ%2FTtrVttLIF1iq3raYJDsUaP%2By1dX4MQCBoXsgOGc91j0xhBcdd11%3D

  • MDM Enrollment URL (profile): https://ds618.awmdm.com/DeviceServices/Enrollment/DeviceMdmConfiguration.aspx?shid=27914285-2738-488d-9217-ad517ecc51d8

As a quick reminder, here’s the workflow to add an iPhone/iPad to Apple Business Manager with VMware Workspace ONE and AC2:

  1. Download and Install Apple Configurator 2

  2. Create a Wi-Fi configuration profile (File > New Profile)

  3. Go to Preferences > Organizations and login with your Apple Business Manager Apple ID

  4. Open VMware Workspace One, and export the enrollment profile (available from Settings > Apple > Automated Enrollment > Export in VMware Workspace ONE)

  5. Open enrollment profile in AC2

  6. Copy “MDM Enrollment URL”

  7. Go to AC2 Preferences > Servers and add a new server, paste the MDM Enrollment URL.

  8. Create a new Blueprint (or connect a device), right click > Prepare…

    1. Prepare with: Manual Configuration

    2. Select “Add to Device Enrollment Program”

    3. Click Next

    4. Select your MDM Server

    5. Select your Orgnization

    6. Skip Setup Assistant steps as needed

    7. Select Wi-Fi profile (created on step 2)

    8. Click Prepare

Deploying macOS Apps with Microsoft Intune

Microsoft Intune supports the deployment of applications using InstallApplication. This opens the possibility to manage Mac computers with Microsoft Intune, and automatically push Munki to provide additional functionality.

The process for that is outlined in How to add macOS line-of-business (LOB) apps to Microsoft Intune

Make sure:

As far as I know, there’s no way to make these macOS LOB apps to be installed during the setup assistant (also called: “Bootstrap package”. In practice, the delay between enrolment and the app being deployed can be quite long (I’ve seen 5 minutes while clicking on “Sync” frantically). Also, Microsoft Intune seem to be a little slow to report success or failure in the console. Perhaps time for a User voice feedback?

Boot to macOS Recovery in VMware Fusion 11

I found the following three ways to boot to macOS recovery in VMware Fusion, sadly they don’t all work in version 11:

  1. Add macosguest.forceRecoveryModeInstall = "TRUE" to you .vmx file – however it doesn’t seem to work with APFS volumes

  2. Add bios.bootDelay = "5000" to your .vmx file and press CMD+R during boot – doesn’t seem to work (it opens VMware Boot Manager)

  3. Use vfuse from Joe Chilcote with an AutoDMG dmg with the –recovery flag (thanks Arek!)

I found a fourth way that seem to work with VMware Fusion 11:

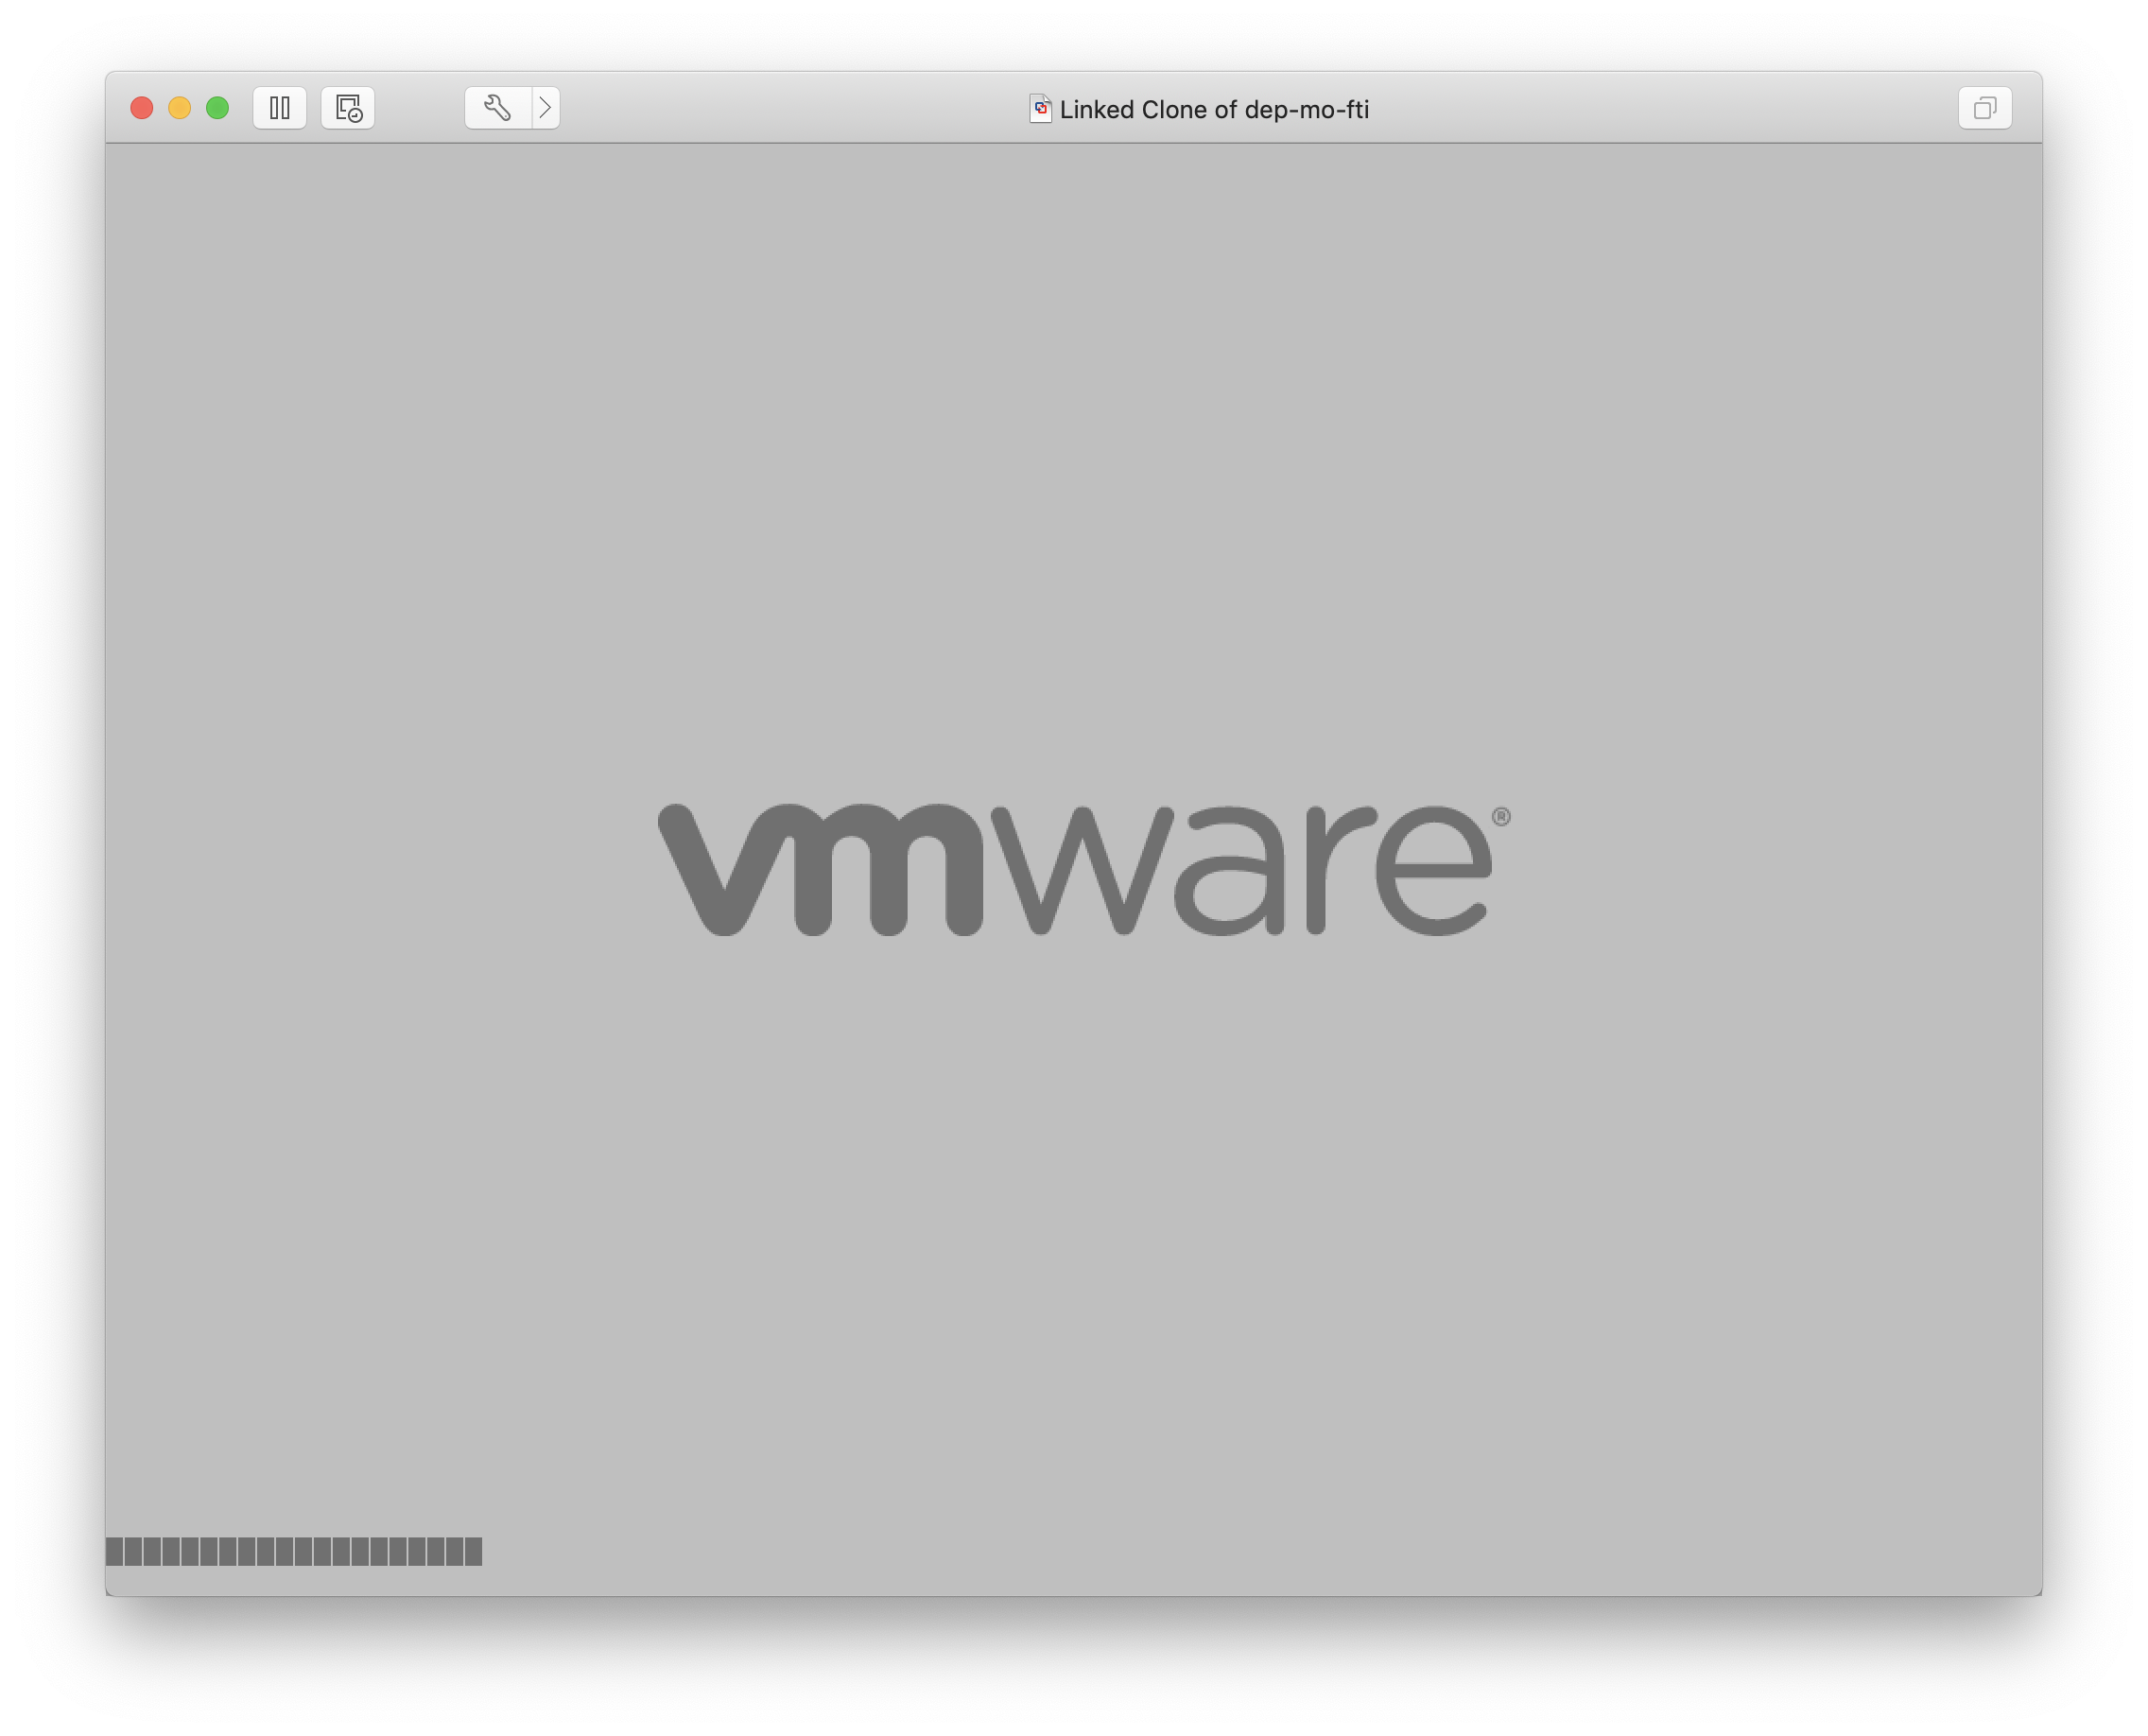
press “R” at the VMware logo (you may need to click in the VM so it captures your keystrokes)

press “R” at the VMware logo (you may need to click in the VM so it captures your keystrokes)

Select Enter Setup

Select Enter Setup

Select Boot from a File

Select Boot from a File

Select Recovery,[…]

Select Recovery,[…]

Select &lt;[…]&gt;

Select <[…]>

Select boot.efi

Select boot.efi

SSH key: How to use the keychain for the passphrase

If you use an SSH identity to connect to remote hosts, chances are you dislike typing the passphrase over and over again (especially with GitHub).

$ git pull
Enter passphrase for key '/Users/fti/.ssh/id_rsa': 

You could certainly use an empty passphrase, but there's a better way. You can actually configure the SSH client to use your keychain instead, by creating ~/.ssh/config (I set the mode to 600):

Host *
    UseKeychain yes
    AddKeysToAgent yes

Then, at the next connection, your password will be saved!

$ ssh-add -l
The agent has no identities.
$ git pull
Enter passphrase for key '/Users/fti/.ssh/id_rsa': 
remote: Counting objects: 122, done.
remote: Compressing objects: 100% (15/15), done.
[...snip...]
 2 files changed, 2 insertions(+), 22 deletions(-)
$ ssh-add -l
2048 SHA256:1M1I1LTcAM1IA+WdfX/ch8QzJeObHcAAcM1Idfc2gy1I1  (RSA)
$
$ ssh-add -l
2048 SHA256:1M1I1LTcAM1IA+WdfX/ch8QzJeObHcAAcM1Idfc2gy1I1  (RSA)
$ git pull
Already up to date.
$

Managing Microsoft SCEP / ESET Cyber Security for Mac

I've been willing to write a blog post about Microsoft SCEP for some time, but Neil Martin already did, and there's nothing left for me to add. Yet ;-)

If you’re using Microsoft System Center Configuration Manager (SCCM) to deal with Windows machines in your environment, you may notice that it comes licensed with an antivirus/malware product; Endpoint Protection (SCEP), with versions for Windows, Linux and macOS.
— Neil Martin

While 4.5.28.1 only supports 10.6 - 10.12, we had some success forcing the installation and testing with a sample EICAR virus file. I wouldn't recommend this on production environment and would encourage you to ping your Microsoft rep. ESET Cyber Security for Mac is compatible with 10.13, so it should arrive someday soon.

  • Part 1 - Changing global settings with scep_set
  • Part 2 - Reading the logs
  • Part 3 - User-specific GUI preferences

Note: Some of this might translate to ESET using `esets_set`.

Note2: I'm not endorsing the use of this software.

Thank you Neil for your hard work!

Microsoft OneDrive: SharePoint & using the standalone installer

Microsoft OneDrive is a pretty good tool to sync OneDrive cloud storage with your Mac. It is quite similar to Dropbox, Box or Google Drive.

But when you use Sharepoint, it becomes incredibly useful. You can sync your Sharepoint folders locally! This is a feature that was recently merged from OneDrive for Business. All you need is to install Microsoft OneDrive on your Mac, connect to your SharePoint server, go to the folder you want to sync and click "Sync".

Screen Shot 2017-10-09 at 16.18.36.png

This is something that will make your Mac users pretty happy. 

Please note that the Mac App Store version don't have the same features as the standalone install. Version numbers are very similar, but the App Store version is sandboxed while the standalone version is not. It means that some feature will only be available in the latter version. So get the standalone version here. Microsoft is not so vocal about it.

You will find more information on the configuration keys you can use to manage Microsoft OneDrive here: Configure the new OneDrive sync client on macOS.

There's also two interesting scripts you can use, which you can find in OneDrive.app/Contents/Resources:

  • CollectLogsStandandalone.command will collect logs and settings and zip them on the desktop
  • ResetOneDriveAppStandalone.command will delete containers, logs, settings, finder extension and keychain items. 

It may be a good idea to create two Policies accessible in Jamf Self-Service to execute one or the other.

Eight Noteworthy channels on the MacAdmins Slack

The MacAdmins slack is probably the best place to meet MacAdmins today. The community is helpful, thankful and many vendors are present and listening. 

General  channels

  •  #ask-about-this-slack: where you can meet admins and get help on the MacAdmins slack
  •  #protips: see all posts tagged with a ProTip emoticon. 
  • #jobs-board: get and post job openings. A good tip is to set a notification for any new post, or matching a specific name (for example, state or country). Don't respond here or you'll get the 🐼. Use  #jobs-chat. Keep in mind that with more than 13.000 members, the hiring manager or a member of the team you'd join might be there. 
  • #blog-feed: your RSS reader on Slack. A good way to find new blogs. You can add yours with  /feed. Use #blog-chat to discuss posts. 

Specific channels

  • #dep : for the Apple Device Enrollment Program. It's also a great place to ask if DEP is down, should that ever happen
  • #autopkg : Tim and Hannes are present, and they do a great job populating the FAQ. So read it before asking questions. 
  • #microsoft-office : Microsoft engineers and PM are present and they listen carefully. They also help us whenever we're stuck on a difficult or exotic issue. 
  • #security : some of the best security researchers are there. It's good keeping an eye on this one. 

There are many, many more channels. Some focus on a specific technology, some others on a passion, and many are about a specific product. You can also find regional channels, like #macadminsfr for French-speaking MacAdmins. 

Please remember that this service is provided for free by volunteers. It's ok to be passionate, but don't spam. Please be nice and respectful to your peers to keep the community healthy. Remember there are many different cultures, some may be offended by something you consider harmless. 

Restoring from a snapshot with APFS

APFS now support snapshots, a feature users of Virtual Machines love and can barely live without! 

You can now take a snapshot from command line by typing "sudo tmutil snapshot" in the Terminal. 

You will then be able to browse it and restore individual files using either Time Machine GUI or the "tmutil restore" command in Terminal.  

Little known, the possibility to jump your computer back to a snapshot you previously created. 

Boot on macOS Recovery (with CMD+R) and select Restore From Time Machine Backup.  

IMG_0423.JPG

The click Continue

IMG_0415.JPG

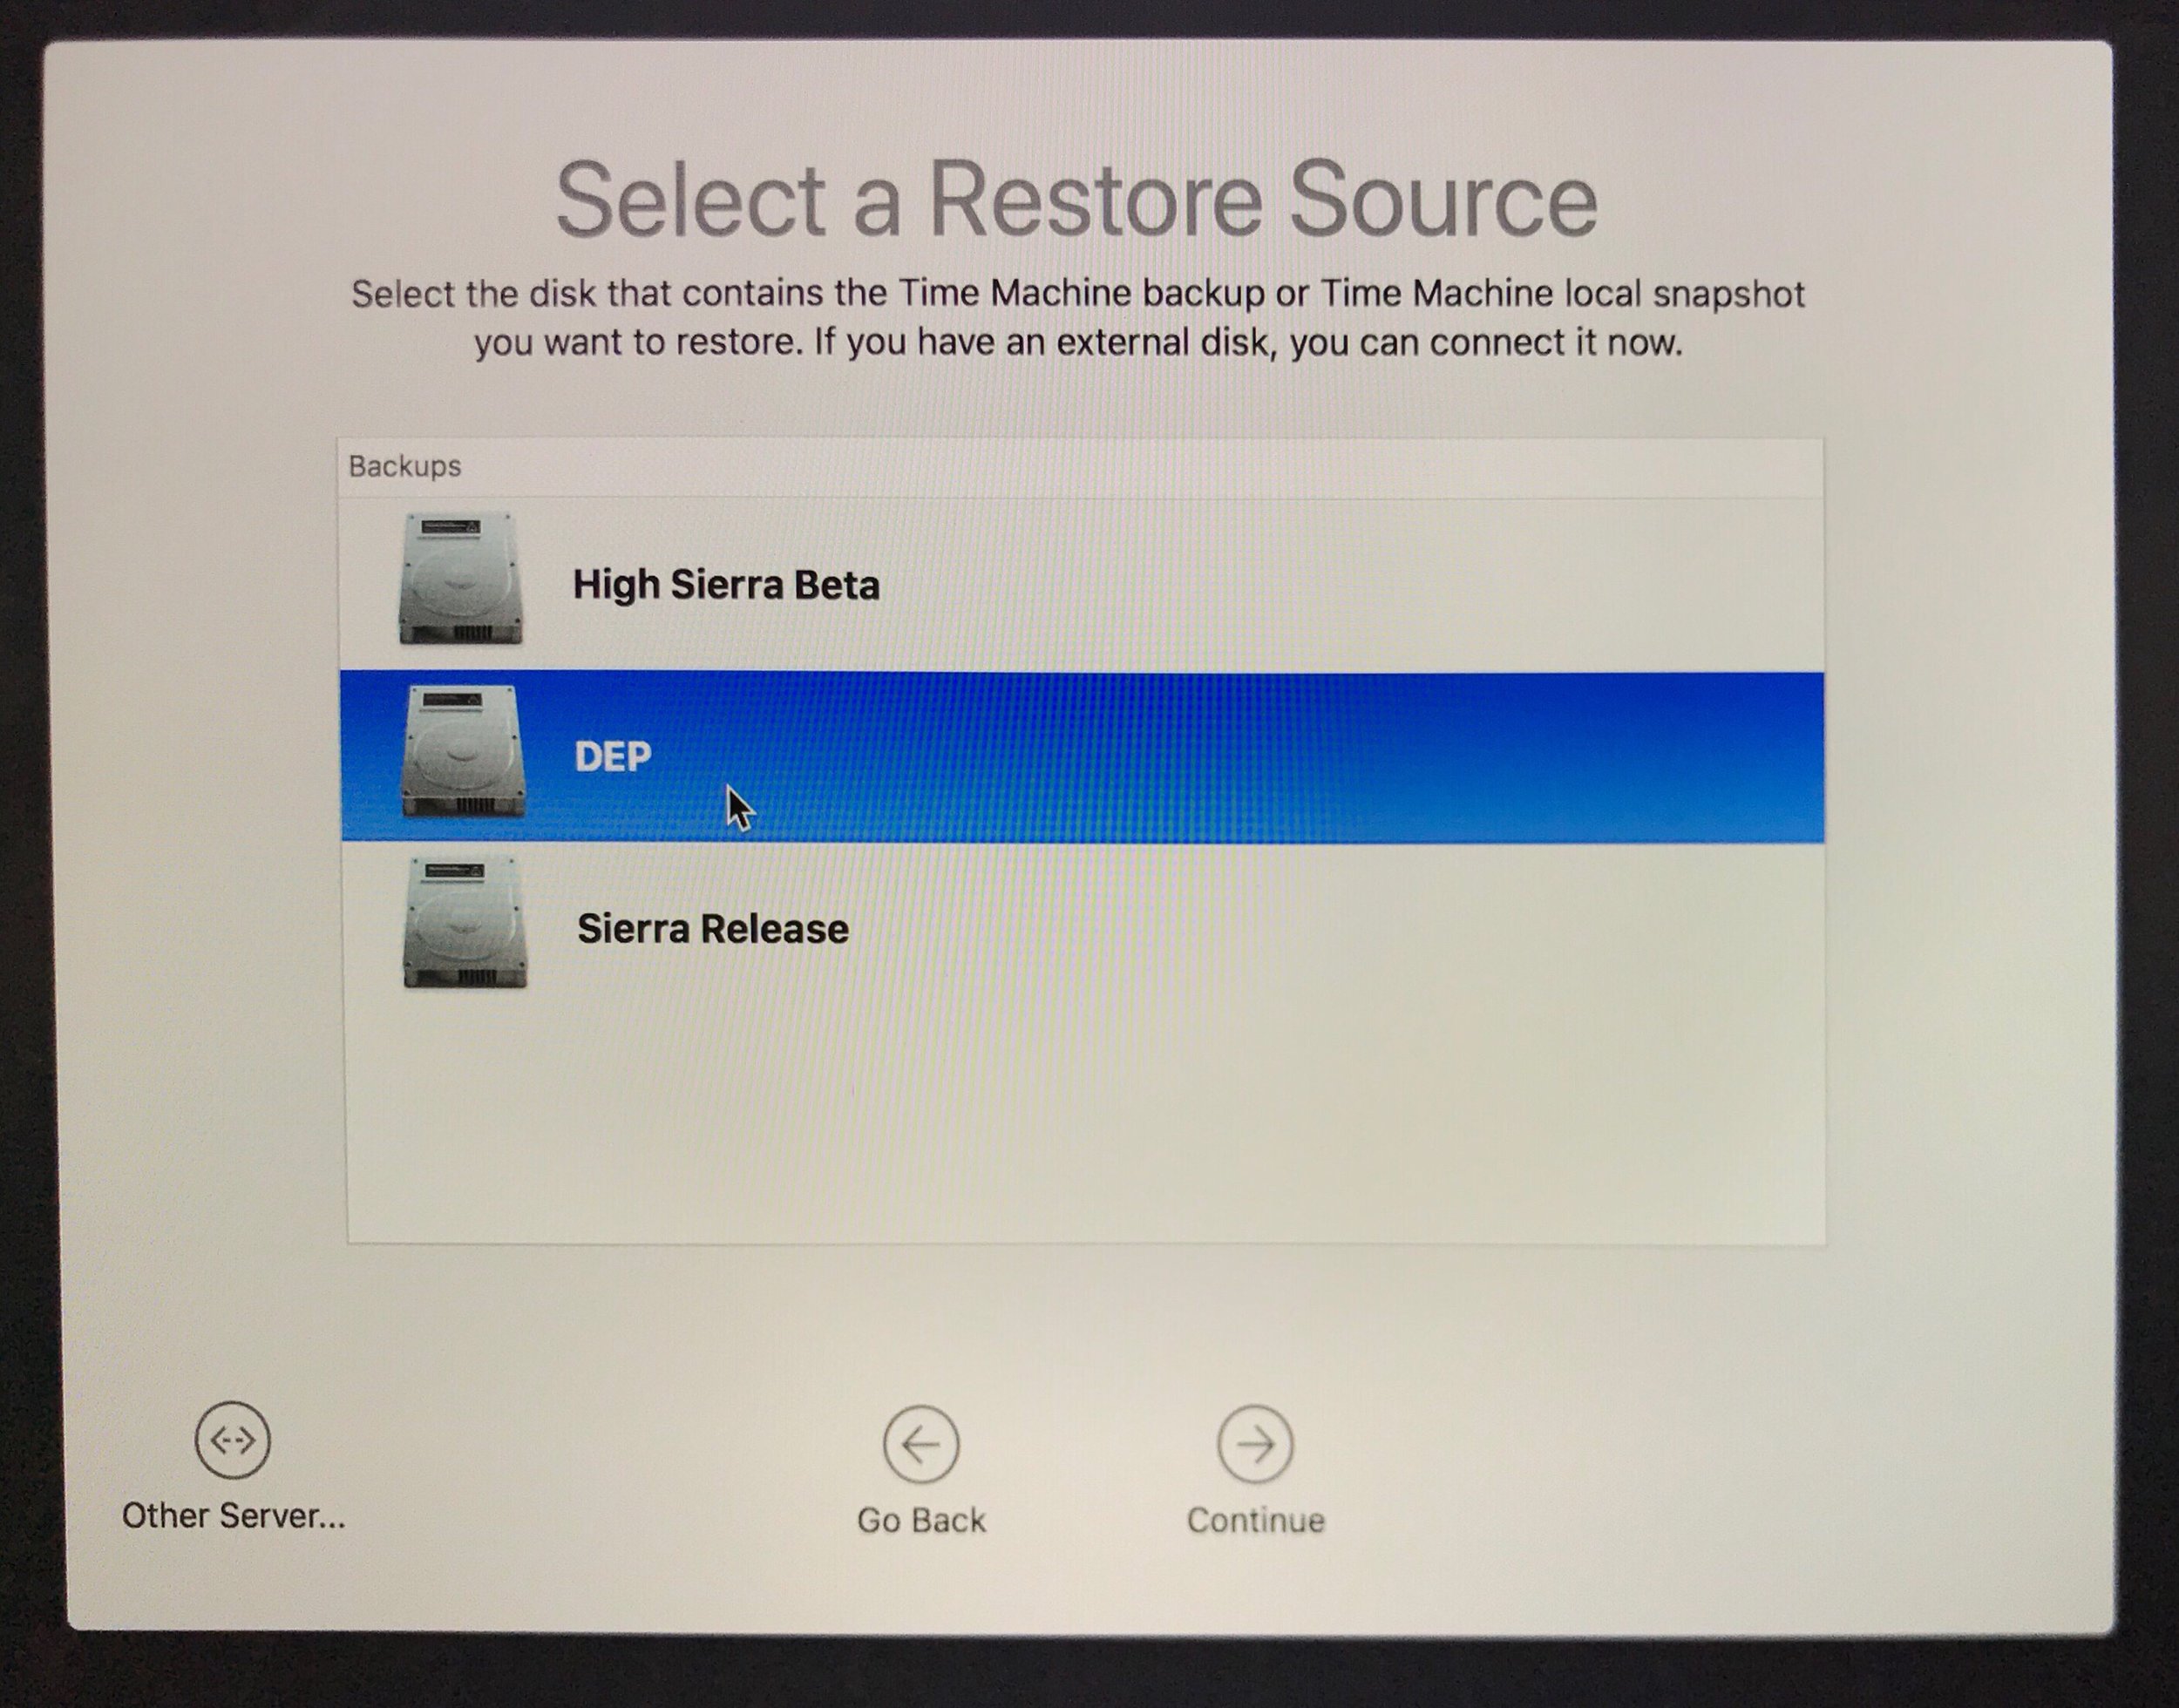
Select your boot drive (from where you run the tmutil command) 

IMG_0414.JPG

Select the Local Snapshot you want  

IMG_0413.JPG

Continue

IMG_0412.JPG

Restoring takes only a few seconds! 

IMG_0411.JPG

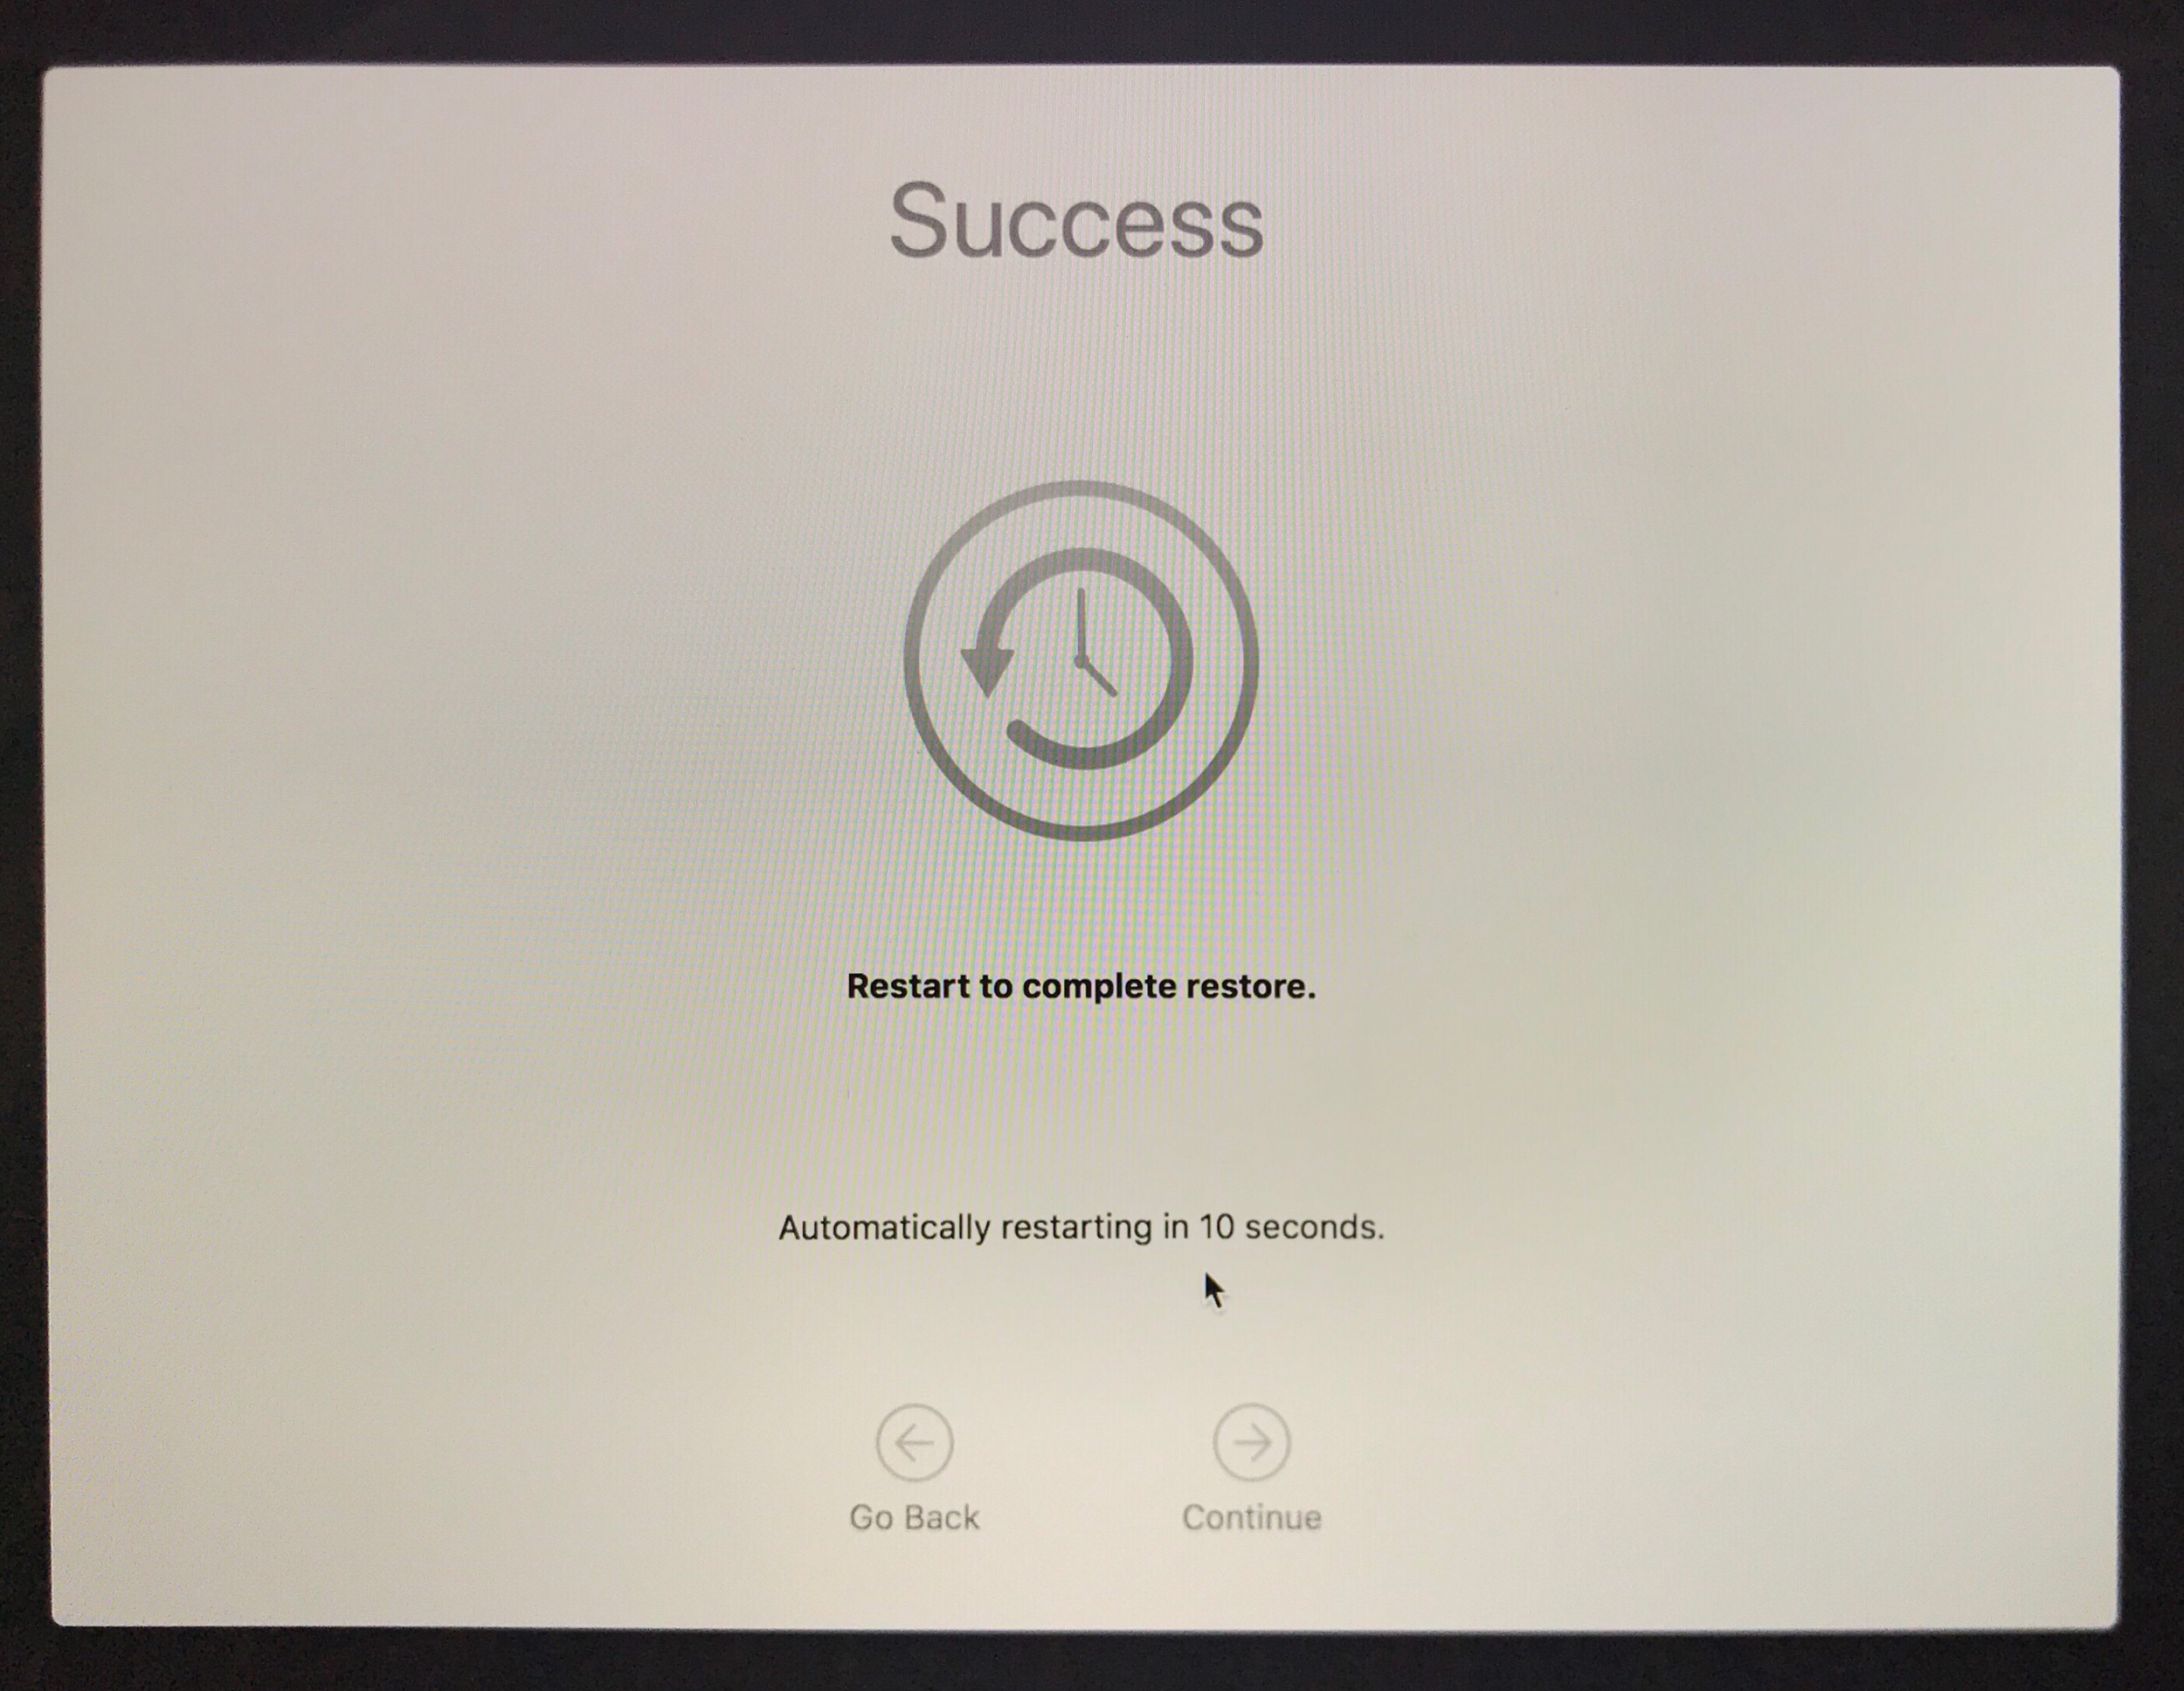
Reboot, and done!  

IMG_0410.JPG


For more information on APFS, I encourage you to watch Rich Trouton's talk: "Storing our digital lives: Mac filesystems from MFS to APFS" at the Pen State MacAdmins Conference 2017 conference: 

Rich will present an updated talk in a few weeks at JNUC

NSPersistentDocument: *** Assertion failure in -[NSVBSavePanel viewWillInvalidate:]

If you get the following error when saving your new NSPersistentDocument:

2017-09-17 21:14:30.531466+0200 TST_NSPersistentDocument_Override_MC[57707:11669067] *** Assertion failure in -[NSVBSavePanel viewWillInvalidate:], /BuildRoot/Library/Caches/com.apple.xbs/Sources/AppKit/AppKit-1561/Nav.subproj/OpenAndSavePanelRemote/NSVBOpenAndSavePanels.m:387
2017-09-17 21:14:30.543482+0200 TST_NSPersistentDocument_Override_MC[57707:11669067] -[NSVBSavePanel init] caught non-fatal NSInternalInconsistencyException 'bridge absent' with backtrace (
    0   CoreFoundation                      0x00007fff283360fb __exceptionPreprocess + 171
    1   libobjc.A.dylib                     0x00007fff4ebe4c76 objc_exception_throw + 48
    2   CoreFoundation                      0x00007fff2833be92 +[NSException raise:format:arguments:] + 98
    3   Foundation                          0x00007fff2a3d2690 -[NSAssertionHandler handleFailureInMethod:object:file:lineNumber:description:] + 193
    4   AppKit                              0x00007fff25b3ec4e -[NSVBSavePanel viewWillInvalidate:] + 188
    5   ViewBridge                          0x00007fff4c551cb3 -[NSRemoteView invalidate:] + 292
    6   ViewBridge                          0x00007fff4c55f449 -[NSRemoteView _advanceToConfigPhaseLegacy] + 1111
    7   ViewBridge                          0x00007fff4c5602dc -[NSRemoteView _viewServiceMarshalProxy:withDetailedErrorHandler:] + 230
    8   ViewBridge                          0x00007fff4c5606c5 -[NSRemoteView _viewServiceMarshalProxy:withErrorHandler:] + 78
    9   ViewBridge                          0x00007fff4c552755 -[NSRemoteView bridge] + 227
    10  AppKit                              0x00007fff25afa5f6 -[NSVBSavePanel init] + 292
    11  AppKit                              0x00007fff25afa1a1 +[NSSavePanel _crunchyRawUnbonedPanel] + 72
    12  AppKit                              0x00007fff2646c0ba -[NSDocument(NSDocumentSaving) _preparedSavePanelForOperation:] + 263
    13  AppKit                              0x00007fff2646cb1c __104-[NSDocument(NSDocumentSaving) _runModalSavePanelForSaveOperation:delegate:didSaveSelector:contextInfo:]_block_invoke_2 + 317
    14  AppKit                              0x00007fff25c0180a -[NSDocument _commitEditingThenContinue:] + 472
    15  AppKit                              0x00007fff25f97481 __62-[NSPersistentDocument _documentEditor:didCommit:withContext:]_block_invoke + 52
    16  CoreFoundation                      0x00007fff282ce52c __CFRUNLOOP_IS_CALLING_OUT_TO_A_BLOCK__ + 12
    17  CoreFoundation                      0x00007fff282b0f43 __CFRunLoopDoBlocks + 275
    18  CoreFoundation                      0x00007fff282b0d08 __CFRunLoopRun + 3128
    19  CoreFoundation                      0x00007fff282afe43 CFRunLoopRunSpecific + 483
    20  HIToolbox                           0x00007fff275cf866 RunCurrentEventLoopInMode + 286
    21  HIToolbox                           0x00007fff275cf5d6 ReceiveNextEventCommon + 613
    22  HIToolbox                           0x00007fff275cf354 _BlockUntilNextEventMatchingListInModeWithFilter + 64
    23  AppKit                              0x00007fff258cd44f _DPSNextEvent + 2085
    24  AppKit                              0x00007fff26062508 -[NSApplication(NSEvent) _nextEventMatchingEventMask:untilDate:inMode:dequeue:] + 3044
    25  AppKit                              0x00007fff258c225d -[NSApplication run] + 764
    26  AppKit                              0x00007fff258913fe NSApplicationMain + 804
    27  TST_NSPersistentDocument_Override_MC 0x000000010000379d main + 13
    28  libdyld.dylib                       0x00007fff4f7d3145 start + 1
    29  ???                                 0x0000000000000003 0x0 + 3
)

This is due to the fact that, by default, Xcode only adds the "Read Only" permission to "User Selected File".

Before.png

Change it your Target > Capabilities > App Sandbox settings and rebuild!

After.png

SplashBuddy at JNUC'17

On October 25th, we’ll do the first SplashBuddy Jumpstart 

My goal is to have you walk out of the room with a fully functional SplashBuddy install, ready to be used. 

If you’re coming to JNUC, please join us! If you’re not and interested, let me know on Twitter (@ftiff) or MacAdmins Slack (#SplashBuddy) and let’s organise a webex. I also encourage you to subscribe to the SplashBuddy newsletter to get announcements and tips & tricks.  


FSMonitor: Easily find what's being modified on your file system.

What tool do you use when you try to snoop it and find which find are being modified? Do you use Jamf Composer? fs_usage? FSEventer?

Well FSMonitor might be your new best buddy. It was soft launched earlier this year. I just cannot believed I missed it. Thank you, Armin Briegel, for telling me!

tree.png

Well the website is complete enough that I don't need to add anything apart from some good use cases (Tweet/Comment if you have other ones!):

  • Find which plist gets modified from a particular setting
  • Find what files get moved/installed/removed when doing something such as installing Chrome
  • See if a process is doing stuff behind your back

Just a word of caution: Packaging is hard, try not to if you can. Sometimes, pushing the original package with a Configuration Profile might suffice. Also, events might get dropped if there's too many. That's by design from the Apple API.

I'll be talking about 'JAMF and...' at JNUC ‘17

On October 26, 2017 at 11:30 (subject to change) I’ll give my first talk at a conference. 

FullSizeRender.jpg

While I loved my Macintosh Classic when I was a kid, I really started IT with FreeBSD. I loved how simple and elegant this OS was. I’m not saying it wasn’t complex and difficult to use, but the software engineers behind seemed to like simple things (as in good design). When I heard that Apple used BSD as its underlying kernel, I quickly jumped and bought a white iBook. And that was love at first use. I missed the open source part, but how happy was I to have a computer which could do a lot out of the box. And I never looked back. 

My first job was at Apple, as an AppleCare agent. I quickly moved to Tier 2, then became a Software Test Engineer thanks to Benoit Roche. But that was just before the release of the iPhone, where all the resources were dedicated to it, and i wasn’t in the loop. I got QuickTime for Windows. Adding the fact that this was in Ireland and my girlfriend was living in Paris, i quickly resigned and came back to Paris. Well... enough digression.  

Long story short, I became a MacAdmin. And implemented Jamf Pro in 2011. I instantly loved this product, thanks to the Jumpstart. I love that it was made by and for MacAdmins. The community is positive and helpful, something quite rare in IT administration.

Six years later, I will be on stage to talk about its Open Source ecosystem.  

IMG_0238.PNG

My goal is to invite MacAdmins to use open source projects with Jamf Pro, and get them to contribute back to the community.  

I was a consumer for ten years, until I started to release some scripts and tools. Releasing a new version of pmbuko’s KerbMinder was a major milestone for me. At that time, few people knew about Enterprise Connect, and NoMAD didn’t exist. Perhaps I helped spark the « you don’t need to bind your Mac computers anymore » by adding a login dialog box to KerbMinder. Joel and Rick did such a good job we soon decided to stop development of KerbMinder and ADPassMon. 

Then I started SplashBuddy. I focused on the things I love most: good design, open source and community. Today, many people use it. I don’t have the exact figures, but I know it’s used in many environments worldwide. The feedback has been overwhelmingly positive.

If you have an Open Source software you're using with Jamf and would like to showcase, please give me a shout on Twitter (@ftiff) or Slack.


High Sierra: Set a Global Shortcut to Lock Screen

Some time ago, I made ftiff/MenuLock to help users lock the screen of their Mac with a simple key shortcut (CMD+L, like on Windows). 

In High Sierra, this will be native with CMD+CTRL+Q, and I will deprecate MenuLock.

But this doesn't mean you cannot change the shortcut. macOS has a built-in way to change shortcuts:

  1. Open System Preferences

  2. Open Keyboard Preference Pane

  3. Go to Shortcuts tab

  4. Select "App Shortcuts"

  5. Click "+"

  6. Select "All Applications", then type "Lock Screen" (it is case sensitive) and type your shortcut.

  7. Quit System Preferences

Adding a shortcut

Adding a shortcut

Here it is!

Here it is!

Now, you can use CMD+L to lock your Mac. And it's changed in the Apple Menu!

Screen Shot 2017-09-04 at 10.41.48.png

Note: This shortcut is system-wide and will take precedence over any other shortcut, like going to location bar on Safari. Learning CMD+CTRL+Q is best ;-)